How Engine Oil Works: 5 Key Functions for Optimal Performance

Have you ever wondered how oil plays a crucial role in keeping your engine running smoothly? Understanding the function of oil in an engine can help you appreciate its importance beyond just lubrication, impacting performance, longevity, and efficiency.

Oil serves several key functions in an engine: it lubricates moving parts to reduce friction, transfers heat away from critical components, and cleans the engine by carrying away dirt and debris. These roles are essential for optimal engine performance.

Oil’s Role in Engine Function

Oil is a vital component for the proper operation of an engine, providing essential functions that ensure its longevity and efficiency. Understanding how oil works within an engine is crucial for maintaining performance and preventing damage.

  1. Lubrication: Oil creates a thin film between moving parts, reducing friction and wear. This allows components to move smoothly, enhancing performance and extending their life.
  2. Cooling: Engine oil absorbs heat generated by friction and combustion, helping to maintain optimal operating temperatures. This prevents overheating and potential engine failure.
  3. Cleaning: Oil carries impurities, dirt, and debris away from engine components. This prevents buildup that could lead to blockages and reduced efficiency.
  4. Sealing: Oil helps seal gaps between engine components, such as piston rings and cylinder walls, improving compression and overall engine efficiency.
  5. Corrosion Protection: Additives in the oil provide a protective layer on metal surfaces, preventing rust and corrosion from moisture and acidic byproducts of combustion.

These functions illustrate the critical role oil plays in engine performance, making it essential for regular maintenance and timely oil changes to ensure the engine operates efficiently.

Lubrication Mechanism Explained

Oil serves a crucial function in reducing friction between the engine components. This lubrication mechanism is essential for maintaining the efficiency and longevity of the engine. Here’s how oil accomplishes this task:

  1. Formation of a Lubricating Film: Oil creates a thin film between moving parts, such as pistons and cylinder walls. This film minimizes direct contact, reducing wear and tear.
  2. Reduction of Friction: The lubricating properties of oil lower the coefficient of friction between metal surfaces, allowing parts to move smoothly against each other.
  3. Prevention of Metal-to-Metal Contact: By maintaining a protective layer, oil prevents metal surfaces from grinding against one another, which can lead to damage and increased heat generation.
  4. Contaminant Suspension: Oil also traps debris and contaminants, keeping them suspended and away from critical engine parts, further protecting against damage.
  5. Resilience under Pressure: Engine components experience significant pressure. Oil’s ability to maintain its viscosity under high temperatures ensures that it remains effective even in extreme conditions.

This lubrication mechanism is vital for the overall performance and reliability of an engine, helping to ensure it operates smoothly and efficiently over time.

Cooling Properties of Oil

Oil plays a critical role in dissipating heat within an engine, preventing overheating and ensuring optimal performance. As the engine operates, it generates significant heat that must be managed effectively. The cooling properties of oil help maintain a stable temperature, contributing to the longevity and efficiency of engine components.

  1. Heat Absorption: Oil absorbs heat generated by engine parts during operation. As it circulates, it collects heat from surfaces like the cylinder walls and bearings, preventing localized overheating.
  2. Heat Transfer: Once the oil absorbs heat, it transfers it to the oil pan or cooler. This helps distribute the heat over a larger area, allowing for more efficient cooling.
  3. Thermal Stability: Engine oils are formulated to maintain their viscosity and performance at high temperatures. This thermal stability ensures that oil remains effective in both lubricating and cooling engine components under extreme conditions.
  4. Reduced Friction: By creating a lubricating film, oil reduces friction between moving parts, which in turn minimizes heat generation. Less friction means less heat buildup, contributing to overall engine cooling.

In summary, the cooling properties of oil are essential for maintaining engine temperature, enhancing performance, and extending the life of engine components.

Oil Circulation Techniques

Understanding the methods of oil circulation in an engine is essential for optimal performance and longevity. Oil circulation ensures that all moving parts are lubricated, reducing friction and wear. There are several techniques employed in engines to circulate oil efficiently.

The most common method is the pressure lubrication system. In this system, an oil pump draws oil from the oil pan and pushes it through a filter to remove impurities. The filtered oil then travels through oil galleries to reach various engine components, such as the crankshaft, camshaft, and bearings. This method ensures that oil reaches critical areas quickly and maintains adequate pressure.

Another technique is the splash lubrication system, primarily used in older engines and some small engines. In this system, the oil is splashed onto engine parts by moving components, such as the crankshaft. While simpler and less costly, splash lubrication may not provide the same level of protection as pressure systems, especially at high speeds or under heavy loads.

Some modern engines incorporate a combination of both methods or advanced technologies like variable oil pumps, which adjust oil flow based on operating conditions. This adaptability helps improve fuel efficiency and reduce engine wear.

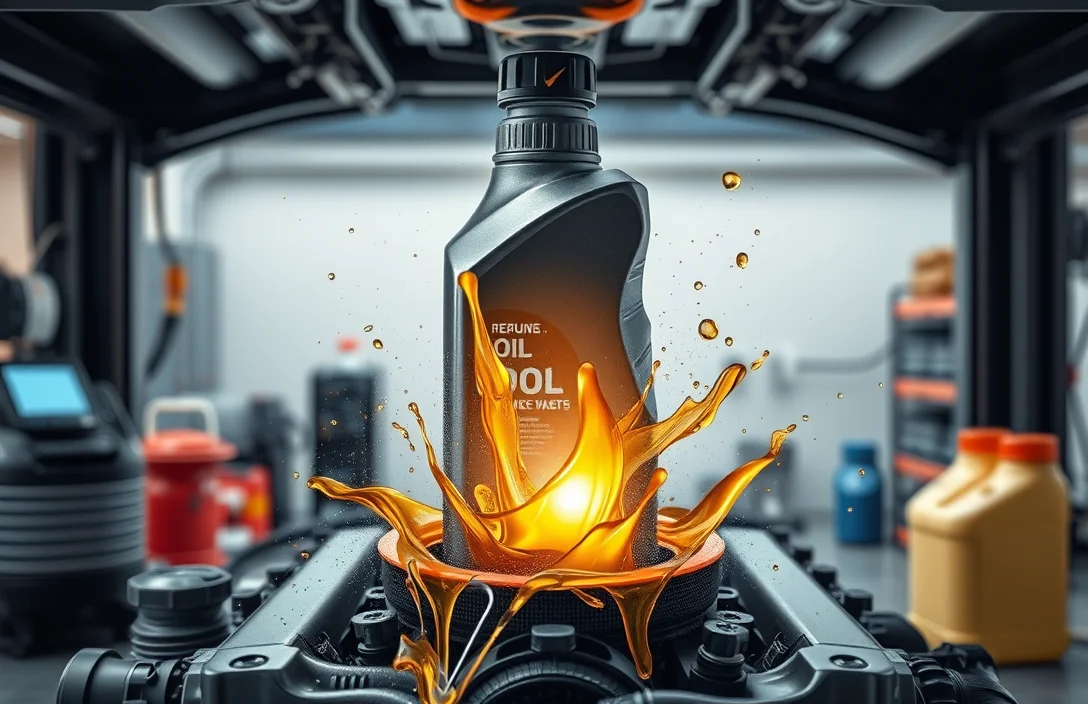
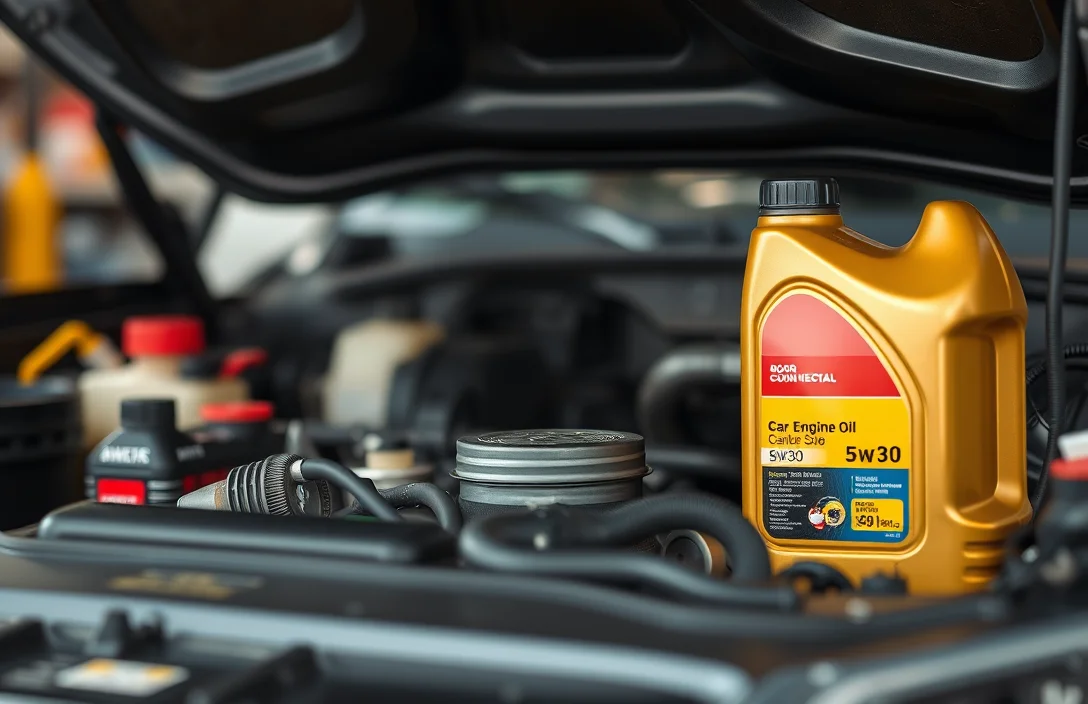
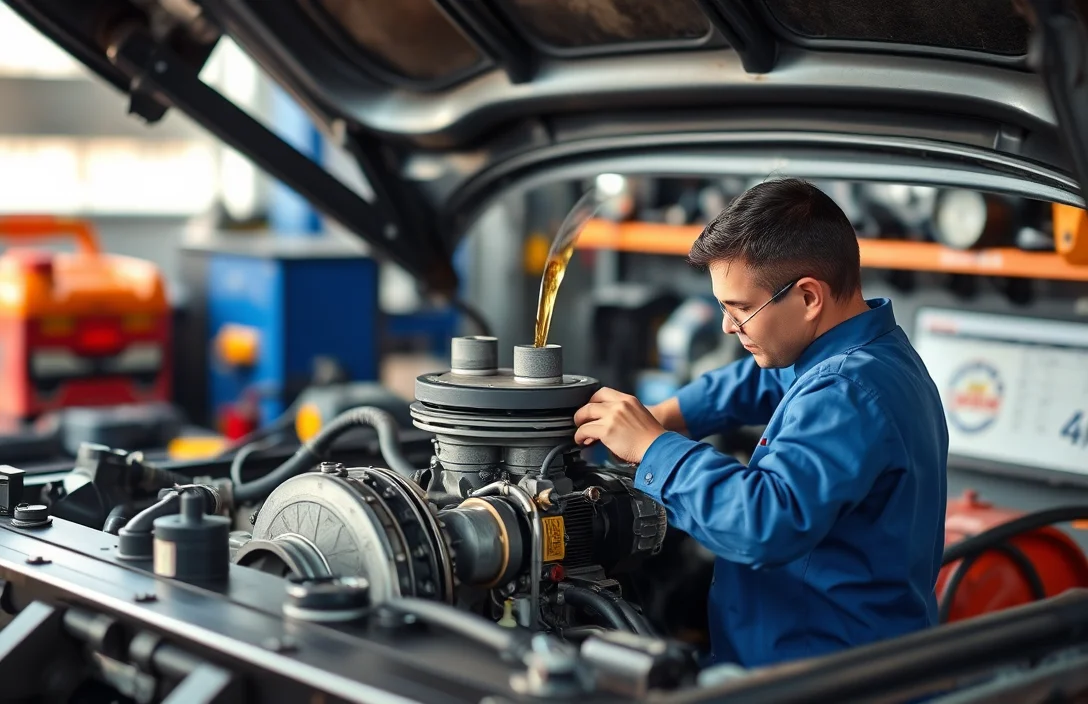
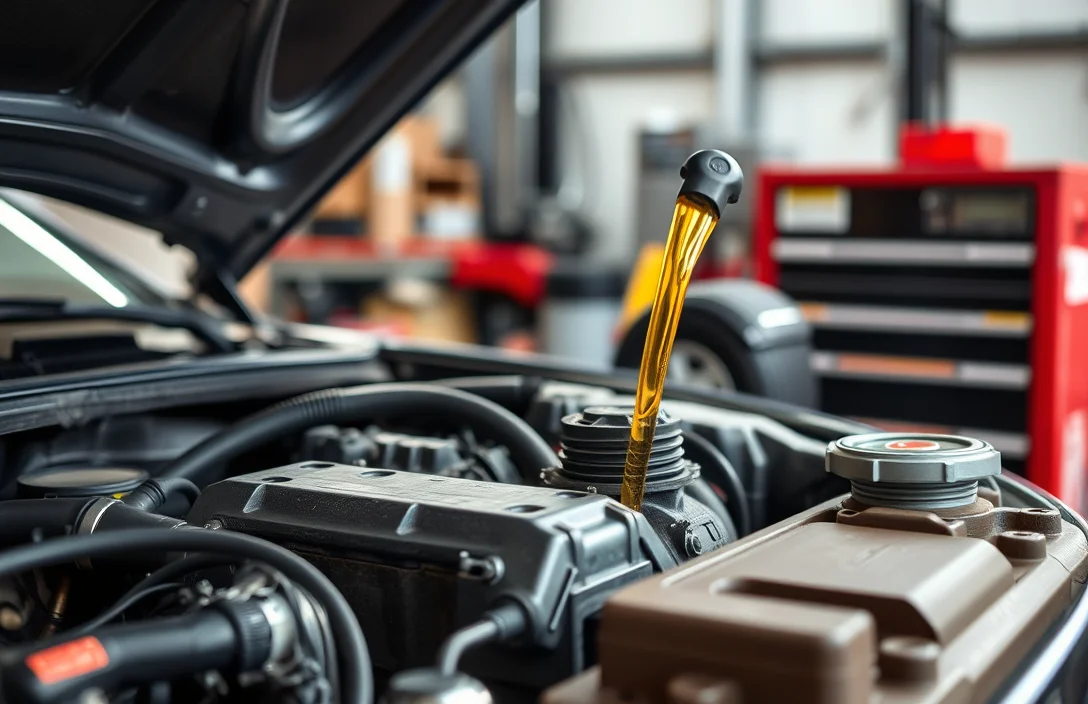
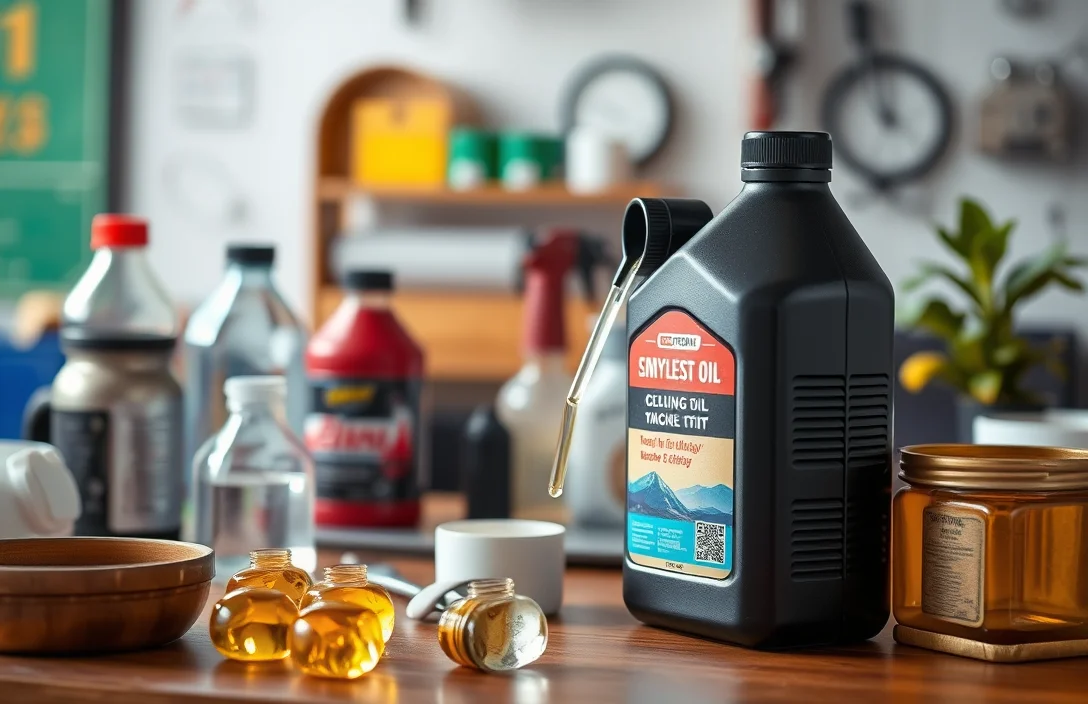
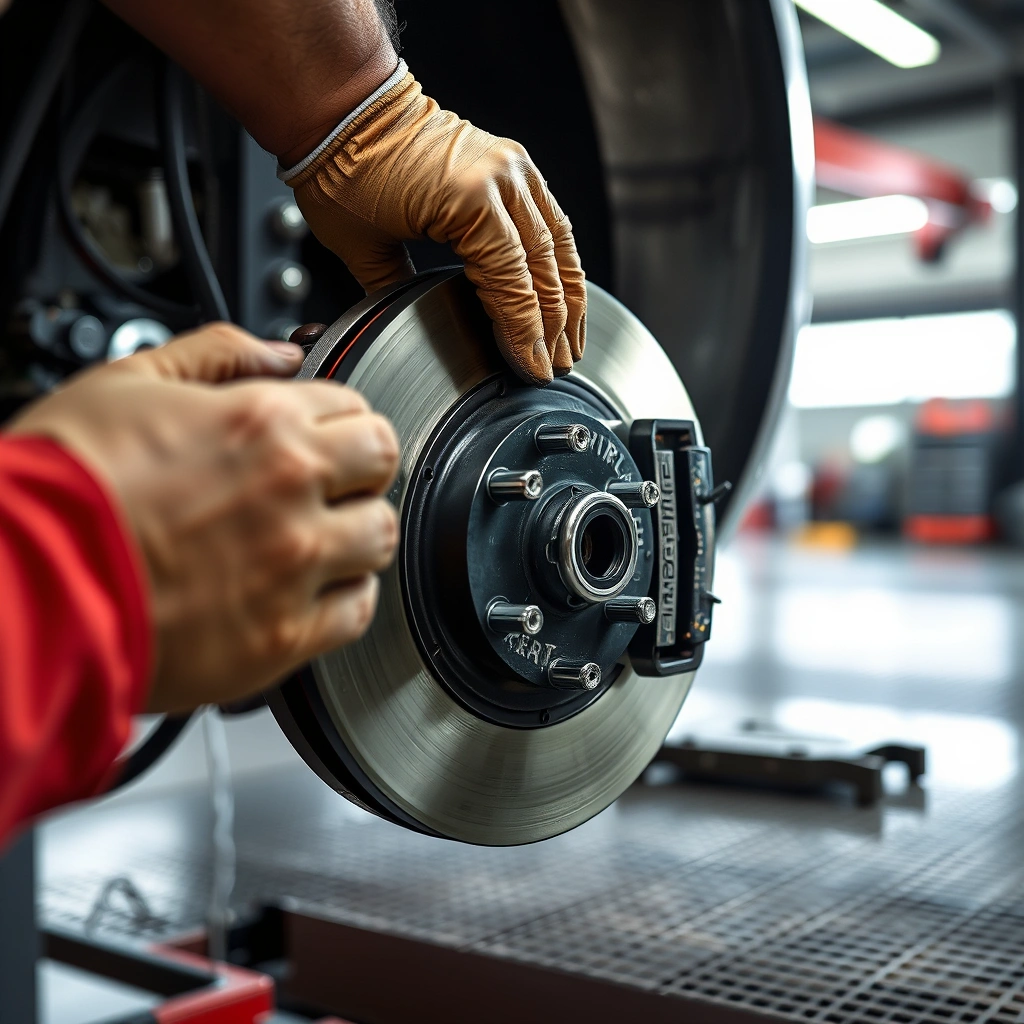
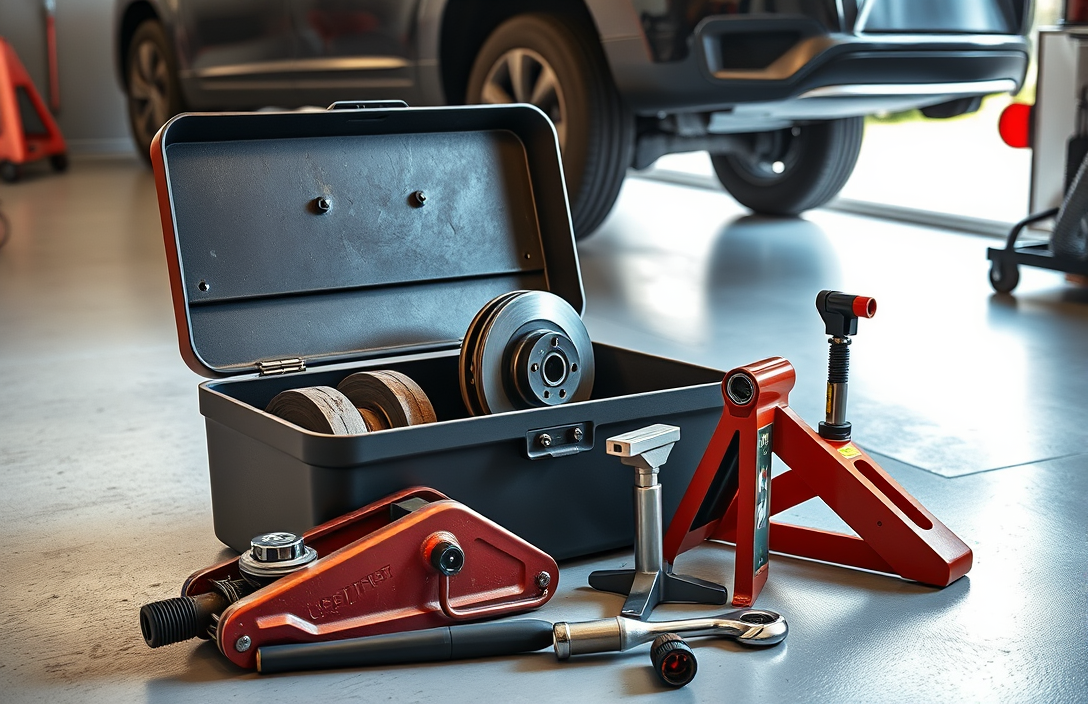
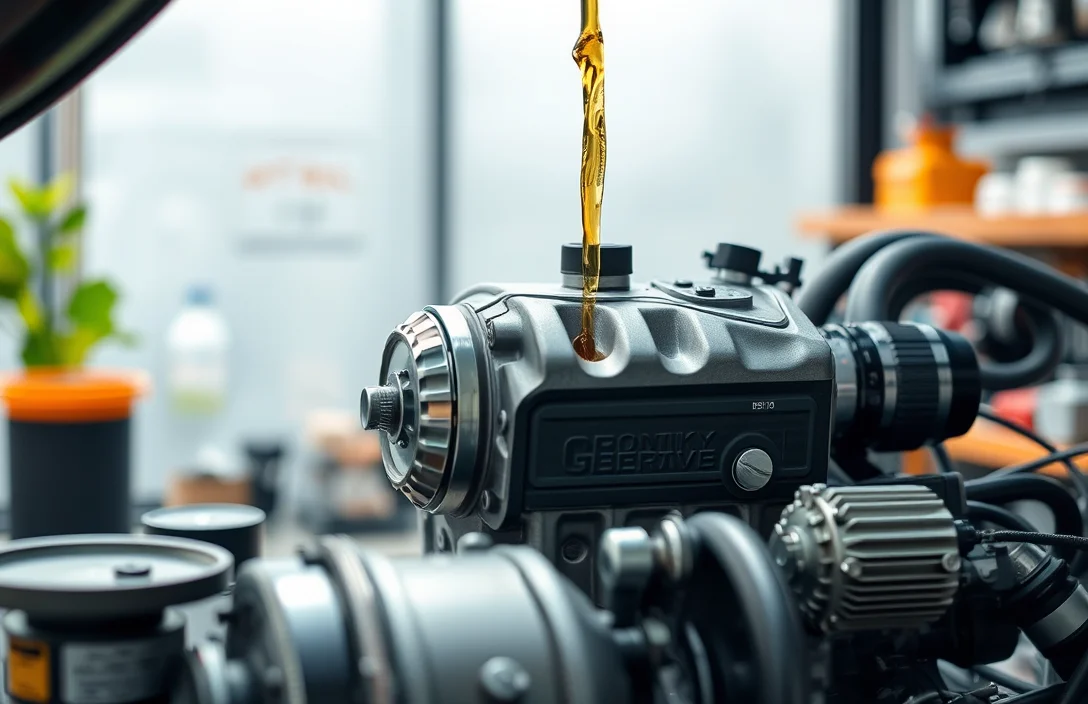
Oil Change Procedures

Changing engine oil is essential for maintaining engine performance and longevity. Follow these steps to effectively change the oil in your vehicle, ensuring a clean and efficient process.

  1. Gather Supplies: Obtain new oil, an oil filter, an oil catch pan, a funnel, and necessary tools (wrench, socket set, etc.). Check your owner’s manual for the correct oil type and capacity.
  2. Prepare the Vehicle: Park the vehicle on a level surface and turn off the engine. Allow it to cool for a few minutes to prevent burns.
  3. Drain Old Oil: Place the oil catch pan under the oil pan. Remove the drain plug and let the old oil fully drain into the pan. Replace the drain plug once the oil has drained.
  4. Replace the Oil Filter: Use an oil filter wrench to remove the old oil filter. Apply a little new oil to the rubber gasket of the new filter, then install it securely.
  5. Add New Oil: Remove the oil filler cap and use a funnel to pour new oil into the engine. Refer to the owner’s manual for the correct amount. Replace the cap securely.
  6. Check Oil Level: Start the engine and let it run for a minute, then turn it off. Wait a minute, then check the oil level using the dipstick and add more oil if necessary.

Synthetic vs. Conventional Oil

This section compares synthetic and conventional motor oils, highlighting their differences and impacts on engine performance. Understanding these distinctions helps in selecting the appropriate oil type for your vehicle’s needs.

Feature Synthetic Oil Conventional Oil
Base Composition Man-made, engineered molecules Derived from crude oil
Performance Superior high-temperature stability Good for standard driving conditions
Viscosity Maintains viscosity in extreme temperatures Can break down in high heat
Frequency of Change Longer intervals, up to 10,000 miles Shorter intervals, typically 3,000-5,000 miles
Cost Higher initial cost Lower initial cost

Synthetic oils generally provide better protection, cleanliness, and fuel efficiency compared to conventional oils. They are engineered to withstand extreme conditions, making them suitable for high-performance vehicles and severe driving conditions. Conventional oils, while effective for regular use, may require more frequent changes and can be less efficient at higher temperatures.

Real-World Engine Oil Failures

Engine oil plays a critical role in maintaining engine health, but failures can lead to severe problems. Understanding these failures can help prevent costly repairs and extend engine life. Here are some common examples of how oil-related issues can affect engine performance.

Insufficient oil levels can cause inadequate lubrication, leading to increased friction and overheating. This situation often results in engine knocking, a sound produced when components collide due to a lack of lubrication. Over time, this can lead to catastrophic engine failure.

Oil breakdown is another significant issue. As oil ages, it loses its viscosity and ability to protect engine components. This degradation can lead to sludge formation, which clogs oil passages and restricts flow. Sludge buildup can cause overheating and even complete engine seizure.

Using the wrong type of oil can also create problems. For example, using conventional oil in an engine designed for synthetic oil can result in poor performance and increased wear. Additionally, oil contamination from fuel, dirt, or coolant can compromise the oil’s effectiveness, leading to accelerated wear and potential engine damage.

Regular maintenance and monitoring oil quality can help mitigate these risks and ensure a smooth-running engine.

Quick Summary

  • Engine oil lubricates moving parts, reducing friction and wear.
  • It helps in cooling the engine by carrying heat away from critical components.
  • Oil cleans the engine by trapping dirt and contaminants, preventing sludge buildup.
  • It provides a sealing function between piston rings and cylinder walls, enhancing compression.
  • Oil also assists in protecting against corrosion and rust within the engine.
  • Regular oil changes are essential for optimal engine performance and longevity.
  • Different types of oil (synthetic, conventional, etc.) have unique properties suited for various engine needs.

Frequently Asked Questions

1. What is the main purpose of oil in an engine?

The primary purpose of oil in an engine is to lubricate the moving parts, reducing friction and wear. It also helps to cool the engine by dissipating heat and cleaning contaminants that can accumulate over time.

2. How often should I change my engine oil?

It is generally recommended to change your engine oil every 3,000 to 5,000 miles, although some modern oils can last longer. Always check your vehicle’s owner manual for specific recommendations based on your engine type and driving conditions.

3. What are the different types of engine oil?

There are several types of engine oil, including conventional, synthetic, and semi-synthetic oils. Synthetic oils provide better protection and performance in extreme conditions, while conventional oils are more economical for standard use.

4. What happens if I don’t use enough oil in my engine?

Not using enough oil can lead to increased friction, overheating, and potential engine damage. Insufficient oil levels can cause critical components to wear out quickly, leading to costly repairs or even engine failure.

5. How can I tell if my engine oil needs to be changed?

You can check your engine oil level and condition by using the dipstick. If the oil appears dark, gritty, or if the level is below the recommended mark, it’s time for a change. Additionally, if you notice engine noises or warning lights, it may indicate an oil issue.

How a Car Battery Works: Diagram & Explanation for Beginners

Understanding car batteries is essential for anyone interested in vehicles. These components power everything from starting the engine to running electrical systems. Knowing how they work can help you maintain your car and troubleshoot issues effectively.

A car battery stores electrical energy and provides power to start the engine. Key features include lead-acid technology, voltage ratings, and maintenance tips. A diagram can illustrate its parts, such as terminals, plates, and electrolyte, enhancing your understanding.

undefined

This section provides an overview of car batteries, focusing on their purpose, components, and functioning. Understanding how a car battery operates is crucial for anyone looking to maintain their vehicle effectively. A car battery stores electrical energy and supplies it to start the engine and power various electrical components.

Car batteries are typically lead-acid batteries, which consist of several key components:

  • Electrolyte: A mixture of sulfuric acid and water that facilitates the chemical reactions needed for energy production.
  • Lead Plates: Positive and negative plates made of lead dioxide and sponge lead, respectively, that react with the electrolyte during discharge and charge cycles.
  • Separator: A material that prevents the positive and negative plates from touching, thus avoiding short circuits.
  • Terminals: Metal connectors that allow for the connection of the battery to the vehicle’s electrical system.

When the ignition is turned on, the battery releases stored energy to start the engine. Once the engine is running, the alternator takes over, recharging the battery and powering the vehicle’s electrical systems. Understanding these basics sets the foundation for deeper exploration into car battery maintenance and troubleshooting.

undefined

This section focuses on the different types of car batteries available in the market. Understanding these types is essential for making informed decisions about which battery best suits your vehicle’s needs. Each type has unique characteristics, advantages, and applications. Below are the primary types of car batteries.

  • Lead-Acid Batteries: The most common type, known for reliability and cost-effectiveness. They come in two main varieties: flooded lead-acid and sealed lead-acid (AGM and Gel).
  • Lithium-Ion Batteries: Gaining popularity due to their lightweight design and longer lifespan. They offer high energy density but come with a higher price tag.
  • Nickel-Metal Hydride (NiMH) Batteries: Commonly found in hybrid vehicles, they provide good performance and moderate cost but are less efficient than lithium-ion options.
  • Absorbent Glass Mat (AGM) Batteries: A subtype of lead-acid battery, AGM batteries are maintenance-free and ideal for vehicles with high electrical demands.

Choosing the right battery involves considering factors like vehicle type, climate, and typical usage patterns. Each battery type’s specific advantages can greatly influence overall performance and longevity.

undefined

This section focuses on the components of a car battery and how they contribute to its overall functionality. Understanding these parts is essential for recognizing how a battery operates and how to troubleshoot potential issues.

A car battery consists of several key components, each playing a vital role in its performance. The main elements include:

  • Positive Terminal: The point where the battery connects to the vehicle’s positive lead, crucial for power delivery.
  • Negative Terminal: Connects to the vehicle’s chassis, completing the electrical circuit.
  • Electrolyte Solution: A mixture of sulfuric acid and water that facilitates the chemical reactions within the battery.
  • Lead Plates: Composed of lead dioxide (positive) and sponge lead (negative), these plates are essential for the electrochemical reactions that produce electricity.
  • Separator: A material that prevents the lead plates from touching, thus avoiding short circuits while allowing ionic movement.

Each component contributes to the battery’s ability to store and deliver electrical energy, which is critical for starting the engine and powering electrical systems in the vehicle. Understanding these components aids in diagnosing issues and performing maintenance effectively.

undefined

This section covers the different types of car batteries available and their specific applications. Understanding the distinctions between these batteries is crucial for selecting the right one for your vehicle’s needs.

Car batteries primarily fall into two categories: lead-acid batteries and lithium-ion batteries. Lead-acid batteries are the most common type, known for their reliability and cost-effectiveness. They come in two main variations: flooded and sealed (also known as maintenance-free). Flooded batteries require regular maintenance, such as checking electrolyte levels, while sealed batteries are designed to be maintenance-free, making them more convenient for everyday use.

Lithium-ion batteries are gaining popularity due to their lightweight and high energy density, but they are typically more expensive. These batteries are often used in electric vehicles (EVs) and hybrid vehicles because they can provide more power and have a longer lifespan compared to traditional lead-acid batteries.

Understanding these types will help you choose the right battery for your vehicle, ensuring optimal performance and reliability. Consider factors such as your vehicle’s power requirements, driving habits, and budget when making your selection.

undefined

This section focuses on the key components of a car battery and their roles in the overall functionality. Understanding these components will help clarify how they work together to provide power to your vehicle.

A typical car battery consists of several important parts:

  • Battery Case: The outer shell that protects the internal components from damage and corrosion.
  • Lead Plates: These are the main components that store electrical energy. They are usually made of lead and are arranged in a series of cells.
  • Electrolyte Solution: A mixture of sulfuric acid and water that facilitates the chemical reaction between the lead plates, allowing the battery to store and release energy.
  • Terminals: The points where the battery connects to the vehicle’s electrical system. They allow the flow of electricity to and from the battery.
  • Separator: A material that keeps the lead plates apart to prevent short circuits while allowing the flow of ions.

Each component plays a crucial role in the chemical reactions that occur during charging and discharging cycles, which ultimately powers your vehicle’s electrical systems and starts the engine.

undefined

This section focuses on understanding the different types of car batteries available on the market. Knowing these types helps in selecting the right battery for your vehicle’s needs. Each type has unique characteristics and applications, which can influence performance and longevity.

Car batteries can generally be categorized into three main types:

  • Lead-Acid Batteries: The most common type, these batteries are reliable and cost-effective. They come in two subtypes: flooded and sealed (AGM). Flooded batteries require maintenance, while sealed batteries are maintenance-free.
  • Lithium-Ion Batteries: Known for their lightweight and high energy density, lithium-ion batteries are becoming popular in electric vehicles. They offer longer life cycles and faster charging times compared to lead-acid batteries.
  • Gel Batteries: These are a type of sealed lead-acid battery where the electrolyte is in a gel form. They are less prone to leakage and can operate in various temperatures, making them suitable for specific applications.

Understanding these types helps in making informed decisions about battery replacement or upgrades. Each type has its strengths and weaknesses, so consider your vehicle’s requirements before making a choice.

undefined

Understanding the maintenance and care of a car battery is essential for ensuring optimal performance and longevity. This section covers practical tips for maintaining your battery, helping you avoid common issues that can lead to battery failure.

Regularly checking the battery terminals for corrosion and ensuring they are clean can significantly enhance battery life. Use a mixture of baking soda and water to clean any buildup. After cleaning, ensure the terminals are tightly connected to prevent any loose connections.

Temperature affects battery performance. Extreme heat can cause the electrolyte to evaporate, while cold temperatures can reduce battery capacity. If you’re in a region with extreme temperatures, consider using a battery insulation kit to protect it from temperature fluctuations.

Periodic testing of the battery’s charge is also beneficial. Most auto parts stores offer free battery testing. This evaluation can help you anticipate when a battery replacement may be necessary, preventing unexpected failures.

Lastly, if a vehicle will remain unused for an extended period, disconnect the battery or use a battery maintainer to keep it charged. This practice prevents deep discharge and prolongs battery life.

undefined

This section focuses on understanding the importance of regular maintenance and care for your car battery. Proper maintenance can significantly extend the lifespan and efficiency of the battery, ensuring reliable performance over time.

Regular checks and maintenance tasks include:

  • Cleaning the terminals: Corrosion can build up over time, affecting the battery’s connection. Clean the terminals with a mixture of baking soda and water to neutralize acid and remove corrosion.
  • Checking the water level: For lead-acid batteries, ensure the electrolyte level is adequate. If it’s low, top it up with distilled water to maintain optimal performance.
  • Inspecting for leaks: Look for any signs of leakage or swelling, which can indicate a failing battery. Replace the battery if you notice any damage.
  • Testing the voltage: Use a multimeter to check the battery’s voltage. A healthy battery should read around 12.6 volts or more when fully charged.
  • Monitor the age: Keep track of the battery’s age, as most car batteries last between three to five years. Knowing when to replace it can prevent unexpected failures.

Implementing these maintenance strategies can help ensure your car battery remains in good condition, ultimately leading to fewer issues and a more reliable vehicle. Regular attention to these details is key to battery longevity.

undefined

This final section summarizes the key points covered in the article regarding car batteries and their diagrams. Understanding these components is essential for effective vehicle maintenance and troubleshooting. Here, we emphasize the importance of knowing how each part functions and how to interpret visual representations.

Car batteries are critical for starting the engine and powering electrical systems. The diagram typically illustrates components such as the positive and negative terminals, the electrolyte solution, and the lead plates. Each part plays a vital role in the battery’s overall function. The terminals connect to the vehicle’s electrical system, allowing for the flow of current. The electrolyte solution facilitates the chemical reactions that produce electrical energy, while the lead plates serve as the electrodes within the battery.

Regular maintenance, including checking the battery’s charge, cleaning terminals, and inspecting for corrosion, can prolong battery life. Understanding the diagram helps identify issues quickly, such as a weak charge or damaged components. This knowledge equips vehicle owners and technicians with the tools to ensure reliability and efficiency in automotive performance.

Quick Summary

  • A car battery stores electrical energy for starting the engine and powering electrical components.
  • Most car batteries are lead-acid types, consisting of lead dioxide and sponge lead plates submerged in sulfuric acid.
  • The battery operates through electrochemical reactions that convert chemical energy into electrical energy.
  • Key components of a car battery include the positive and negative terminals, electrolyte, and separators.
  • Regular maintenance, such as checking the fluid level and cleaning terminals, can extend battery life.
  • Symptoms of a failing battery include slow engine cranking, dim lights, and electrical issues.
  • Replacement is necessary when a battery can no longer hold a charge, typically every 3-5 years.

Frequently Asked Questions

What is a car battery and what does it do?

A car battery is a rechargeable power source that provides electrical energy to start the engine and power electrical components when the engine is off. It stores chemical energy and converts it into electrical energy when needed.

What are the main components of a car battery?

The main components of a car battery include the positive and negative terminals, electrolyte solution (usually sulfuric acid and water), lead plates, and a casing. These parts work together to facilitate the chemical reactions that generate electricity.

How do I know if my car battery is failing?

Signs of a failing car battery include slow engine cranking, dimming headlights, or electrical issues with other components. If your battery is over three years old and you notice these symptoms, it may be time to test or replace it.

How can I extend the life of my car battery?

To extend the life of your car battery, ensure that it is clean and free of corrosion, avoid short trips that prevent full charging, and check the charging system regularly. Additionally, consider keeping your car in a garage to protect the battery from extreme temperatures.

What should I do if my car battery dies?

If your car battery dies, you can try jump-starting it using jumper cables and another vehicle. If that doesn’t work, you may need to replace the battery or seek assistance from a professional mechanic.

Car Batteries 101: Types, Maintenance Tips, and Buying Guide

Understanding car batteries is essential for anyone who relies on their vehicle. These powerhouses do more than just start your engine; they play a critical role in your car’s electrical system and overall performance. This article will cover everything you need to know about car batteries.

Car batteries are crucial for starting your engine and powering electrical systems. Key points include types of batteries, maintenance tips, signs of failure, and recycling options. Knowing these can help you make informed decisions to keep your vehicle running smoothly.

Car Battery Basics

Car batteries are essential components of automotive systems, providing the electrical energy required to start the engine and power various electronic features. Understanding their function and significance is crucial for maintaining vehicle performance and reliability.

A car battery is a rechargeable energy storage device that converts chemical energy into electrical energy. It primarily serves to start the engine by providing a burst of power to the starter motor. Additionally, car batteries supply energy to the vehicle’s electrical systems, such as lights, radio, and air conditioning, when the engine is not running.

Modern vehicles typically use lead-acid batteries, which are composed of lead plates submerged in an electrolyte solution. These batteries are designed to withstand various environmental conditions and deliver high current for short durations. Proper maintenance, such as regular inspections and ensuring clean terminals, can extend a car battery’s lifespan and enhance overall vehicle performance.

Chemistry of Batteries

The chemistry behind car batteries is centered on electrochemical reactions that store and release energy. These reactions occur within the battery’s cells, converting chemical energy into electrical energy, which powers the vehicle’s electrical systems and starts the engine.

Car batteries primarily use lead-acid chemistry, where lead dioxide (PbO2) and sponge lead (Pb) serve as the active materials. The electrolyte, a dilute sulfuric acid solution, facilitates the movement of ions between the positive and negative plates during the discharge and charge cycles.

During discharge, lead dioxide at the positive plate reacts with hydrogen ions from the electrolyte, producing lead sulfate (PbSO4) and water. At the same time, sponge lead at the negative plate also converts to lead sulfate. This process generates electrical energy. When the battery recharges, the reactions are reversed, restoring the original materials and enabling the battery to be used again.

Understanding these chemical reactions is crucial for maintaining battery performance and longevity. Different battery types, such as lithium-ion or nickel-metal hydride, operate on similar principles but involve various materials and reactions, affecting their efficiency, lifespan, and application.

Key Components Explained

This section outlines the main parts of a car battery, which are essential for its functionality and performance. Understanding these components can aid in recognizing issues and the overall operation of the battery.

Lead Plates

Lead plates are the core of the battery and play a crucial role in the electrochemical reactions that generate electricity. There are typically two types of lead plates: positive and negative. The positive plates are coated with lead dioxide, while the negative plates are made of sponge lead. These plates are submerged in the electrolyte solution, facilitating the necessary reactions for energy production.

Electrolyte Composition

The electrolyte in a car battery is comprised of sulfuric acid mixed with water. This solution conducts ions between the lead plates, enabling the electrochemical reactions to occur. The concentration of the electrolyte is critical; too low can lead to battery failure, while too high can cause damage to the plates.

Separator Function

Separators are insulating materials placed between the lead plates to prevent short circuits. They allow ions to pass through while keeping the plates from touching each other. Common materials used for separators include polyethylene and glass fiber, which enhance the battery’s safety and efficiency by maintaining the integrity of the electrochemical reactions.

Battery Maintenance Techniques

Maintaining your car battery is essential for ensuring longevity and optimal performance. Simple practices can significantly extend the life of your battery and help prevent unexpected failures. Below are practical methods for effective battery maintenance.

Regular Inspections

Inspect your battery every few months for signs of wear and corrosion. Check for any cracks or bulges in the casing, which can indicate damage. Look for corrosion around the terminals, which appears as a white, ashy substance. If you notice any issues, address them promptly to avoid further complications.

Cleaning Terminals

Corroded terminals can hinder battery performance. Clean the terminals using a mixture of baking soda and water. Apply the solution with a brush, then rinse with clean water and dry thoroughly. Reconnect the terminals, ensuring they are tight and secure.

Water Levels Management

If you have a lead-acid battery, check the water levels regularly. The electrolyte should cover the plates inside the battery. If it’s low, add distilled water until the levels are adequate. Avoid overfilling, as this can lead to spillage and damage.

Troubleshooting Battery Issues

Identifying and fixing common car battery problems can extend the life of your battery and improve vehicle performance. Understanding the signs of battery failure and testing methods can help you troubleshoot effectively. Follow these steps for practical guidance.

  1. Check for Warning Signs: Look for dimming headlights, slow engine cranking, or electrical accessories malfunctioning. These can indicate a weak battery.
  2. Inspect Battery Condition: Examine the battery for corrosion, leaks, or physical damage. Corroded terminals can affect performance.
  3. Test Battery Voltage: Use a multimeter to check the battery voltage. A healthy battery should read around 12.6 volts or higher when fully charged.
  4. Perform a Load Test: Conduct a load test using a battery tester. This tests the battery under a simulated load to determine its ability to hold voltage.
  5. Check the Charging System: Ensure the alternator is functioning properly. A failing alternator can prevent the battery from charging adequately.
  6. Replace if Necessary: If the battery fails any tests or shows severe signs of wear, replacement is recommended to avoid being stranded.

Comparing Battery Types

This section compares the various car battery types, focusing on their unique characteristics, advantages, and disadvantages. Understanding these differences is crucial for choosing the right battery for your vehicle and driving needs.

Battery Type Pros Cons
Lead-Acid
  • Cost-effective
  • Reliable for starting engines
  • Widely available
  • Heavy
  • Shorter lifespan
  • Less efficient in cold weather
Lithium-Ion
  • Lightweight
  • Longer lifespan
  • Better performance in extreme temperatures
  • Higher cost
  • Requires specific charging systems
  • Less common in traditional vehicles
AGM
  • Maintenance-free
  • Better vibration resistance
  • Longer lifespan than flooded batteries
  • More expensive than flooded batteries
  • Limited availability
Flooded
  • Cost-effective
  • Readily available
  • Requires regular maintenance
  • Vulnerable to spills

Start-stop batteries are specifically designed for vehicles with start-stop technology, providing quick bursts of energy to restart the engine efficiently. They often use AGM technology for enhanced performance.

Real-World Case Studies

This section presents practical examples of car battery usage and failures, highlighting common scenarios and successful maintenance strategies. By understanding these real-world cases, car owners can better manage their batteries and avoid potential issues.

Common Failure Scenarios

One common scenario involves leaving lights on overnight, which can lead to a dead battery by morning. A driver in a cold climate discovered this the hard way, requiring a jump start to get back on the road. Another frequent issue is sulfation, where lead sulfate crystals build up on battery plates due to infrequent use of a vehicle. This can cause reduced capacity and ultimately battery failure, as experienced by a commuter who only used their car on weekends.

Successful Maintenance Stories

Regular maintenance can significantly extend battery life. A fleet manager implemented a routine check-up schedule for their vehicles, ensuring that battery terminals were clean and connections were tight. This proactive approach resulted in fewer breakdowns and a 20% reduction in battery replacements over the year. Another individual adopted a habit of charging their battery monthly to prevent sulfation, which led to a consistently reliable vehicle, even after years of ownership.

Quick Summary

  • Car batteries are essential for starting the engine and powering electrical systems in vehicles.
  • Most car batteries are lead-acid types, which consist of lead plates and sulfuric acid.
  • Battery maintenance, such as checking fluid levels and keeping terminals clean, can extend battery life.
  • Common signs of a failing battery include slow engine cranking, dim headlights, and corrosion at terminals.
  • Temperature extremes can affect battery performance; cold weather can reduce capacity, while heat can accelerate deterioration.
  • Regular testing and replacement every 3-5 years are recommended to ensure reliability.
  • Newer technologies, like lithium-ion batteries, are being developed for electric vehicles and may offer advantages over traditional batteries.

Frequently Asked Questions

What is a car battery and how does it work?

A car battery is a rechargeable energy storage device that provides the electrical power needed to start the engine and power electrical components in the vehicle. It stores energy in the form of chemical energy and converts it into electrical energy through a chemical reaction.

How often should I replace my car battery?

Generally, a car battery should be replaced every 3 to 5 years, depending on factors such as climate, driving habits, and battery maintenance. It’s important to check the battery’s condition regularly to ensure optimal performance and prevent unexpected failures.

What are the signs of a failing car battery?

Common signs of a failing car battery include difficulty starting the engine, dim headlights, and electrical issues with accessories. If you notice any of these symptoms, it’s advisable to have your battery tested and potentially replaced.

Can I jump-start a car with a dead battery?

Yes, you can jump-start a car with a dead battery using jumper cables and another vehicle’s battery. Make sure to follow the correct procedure to avoid damaging the electrical systems of either car.

How can I extend the life of my car battery?

To extend the life of your car battery, ensure that it is securely mounted, keep the terminals clean and free of corrosion, and perform regular maintenance checks. Additionally, avoid short trips that don’t allow the battery to fully charge and consider using a battery maintainer if your vehicle is not used regularly.

How Engine Oil Powers Performance: Key Benefits Explained

Understanding how engine oil works is essential for anyone interested in vehicles. It plays a critical role in maintaining engine health, ensuring smooth operation, and extending the lifespan of your car. Let’s break down this vital lubricant and its functions in a straightforward manner.

Engine oil lubricates moving parts, reduces friction, cools the engine, and cleans contaminants. It helps maintain optimal performance and efficiency, contributes to fuel economy, and protects against wear. Regular oil changes are crucial for keeping your engine running smoothly.

undefined

This section explains the fundamental role of engine oil in the operation of an internal combustion engine. Understanding these concepts is essential for grasping how engine oil contributes to engine performance, longevity, and efficiency.

Engine oil serves multiple functions within an engine. Its primary role is lubrication, which minimizes friction between moving parts, thereby reducing wear and tear. In an engine, metal components constantly move against each other at high speeds. Without lubrication, these parts would generate excessive heat and quickly degrade, leading to engine failure.

In addition to lubrication, engine oil aids in cooling by carrying heat away from critical engine components. The oil absorbs heat generated during combustion and friction, helping to maintain optimal operating temperatures. Furthermore, engine oil also acts as a cleaning agent, trapping dirt, debris, and contaminants that can accumulate over time. This cleaning function helps prevent sludge buildup, ensuring the engine runs smoothly and efficiently.

Finally, engine oil creates a seal between the piston rings and cylinder walls, which helps maintain compression and improves overall engine efficiency. Proper engine oil selection and maintenance are crucial for ensuring these functions are performed effectively, contributing to the engine’s overall health and performance.

undefined

This section covers the fundamental properties of engine oil that contribute to its function within an engine. Understanding these properties is crucial for grasping how engine oil maintains optimal engine performance and longevity. Key characteristics include viscosity, additives, and thermal stability.

Viscosity is the measure of a fluid’s resistance to flow. Engine oils come in various viscosity grades, which indicate how thick or thin the oil is at certain temperatures. Thicker oils provide a stronger film between engine parts, while thinner oils flow more easily, especially at low temperatures. Choosing the correct viscosity is essential for ensuring effective lubrication.

Additives enhance the performance of engine oil. Common additives include detergents, which clean engine parts; dispersants, which keep contaminants suspended; and anti-wear agents, which protect surfaces during high-pressure situations. Each additive plays a role in maintaining engine cleanliness and performance.

Thermal stability refers to the oil’s ability to resist breakdown at high temperatures. As engine oil circulates, it encounters intense heat. An oil that can withstand these conditions without degrading will provide consistent protection and performance, preventing engine wear and damage. Understanding these properties helps in selecting the right engine oil for specific vehicles and driving conditions.

undefined

This section explores the specific functions of engine oil within an engine. Understanding these roles is crucial for grasping how oil contributes to the overall performance and longevity of an engine.

Engine oil serves multiple key functions that are vital for optimal engine operation. The primary role is lubrication, which reduces friction between moving parts. This helps to prevent wear and tear, ensuring smooth operation and extending the engine’s lifespan.

Additionally, engine oil acts as a coolant, helping to dissipate heat generated during combustion. By absorbing heat, it aids in maintaining the engine’s temperature within safe limits. This cooling effect is essential, especially in high-performance engines that generate significant heat under load.

Engine oil also plays a role in cleaning. It picks up dirt, debris, and contaminants that accumulate in the engine. The oil circulates through the engine, carrying these impurities to the oil filter, where they are trapped and removed from the system.

Lastly, engine oil provides corrosion protection. It forms a protective film on metal surfaces, preventing moisture and contaminants from causing rust and corrosion. This protective barrier is crucial for maintaining the integrity of engine components, contributing to overall engine reliability.

undefined

Understanding how engine oil functions as a lubricant is crucial for maintaining engine health. This section will cover the specific roles that engine oil plays in reducing friction and wear, as well as its contribution to cooling and cleaning engine components.

Engine oil minimizes friction between moving parts, which significantly reduces wear and tear. The oil forms a thin film between surfaces, preventing direct contact and thus minimizing damage from metal-to-metal interaction. This is particularly important in high-friction areas like bearings and cylinder walls.

Additionally, engine oil helps to dissipate heat generated during combustion and friction. As oil circulates through the engine, it absorbs heat and carries it away from critical components, helping to maintain optimal operating temperatures. Overheating can lead to severe engine damage, so effective cooling is essential.

Moreover, engine oil serves as a cleaning agent by suspending contaminants such as dirt, soot, and metal particles. This helps to prevent sludge buildup and keeps the engine components clean and functioning optimally. Regular oil changes are necessary to remove these contaminants and replenish the oil’s protective properties.

undefined

This section details the various types of engine oil available and their specific functions. Understanding these types will help you choose the right oil for your vehicle, ensuring optimal engine performance and longevity.

Engine oil comes in several varieties, each designed for specific needs. The most common types include:

  • Conventional Oil: Derived from crude oil, this is the most basic form of engine oil. It provides adequate lubrication for older engines but requires more frequent changes.
  • Synthetic Oil: Engineered from chemical compounds, synthetic oil offers superior performance in extreme temperatures and conditions. It reduces engine wear and improves fuel efficiency.
  • Blend Oil: This combines conventional and synthetic oils, aiming to provide benefits from both. It can be a more economical option while still offering better protection than conventional oil alone.
  • High-Mileage Oil: Formulated for vehicles with over 75,000 miles, this oil contains additives that help reduce leaks and oil consumption, as well as improve engine performance in aging engines.

Each type of oil has its own advantages and disadvantages, and the choice often depends on the vehicle’s age, driving conditions, and manufacturer recommendations.

undefined

This section covers the role of engine oil in maintaining engine temperature and preventing overheating. Proper temperature regulation is crucial for efficient engine performance. Engine oil helps absorb and dissipate heat, allowing the engine to operate within its optimal temperature range.

As the engine runs, friction between moving parts generates heat. Engine oil circulates through the engine, absorbing this heat and transferring it away from critical components. The oil then flows to the oil cooler, where it releases some of the absorbed heat before returning to the engine. This process helps maintain a stable operating temperature, preventing overheating that can lead to engine damage.

Additionally, certain additives in engine oil enhance its thermal stability, allowing it to perform effectively under high-temperature conditions. These additives prevent oil breakdown and maintain viscosity, ensuring that the oil continues to provide proper lubrication and cooling throughout the engine’s operation.

Regular oil changes are essential to maintain effective cooling. Old oil can lose its ability to absorb heat and may contain contaminants that hinder its performance. Using the correct type and grade of engine oil, as specified by the manufacturer, also plays a significant role in ensuring optimal temperature management.

undefined

This section discusses the role of engine oil in maintaining optimal engine performance and longevity. Understanding how engine oil functions not only helps in comprehending its importance but also in recognizing the signs of when it needs to be changed or topped up.

Engine oil serves multiple critical functions within an engine. Primarily, it lubricates moving parts to reduce friction, which is essential for preventing wear and tear. Additionally, engine oil helps to dissipate heat generated during combustion and mechanical movement, thus preventing overheating. It also acts as a cleaning agent, suspending contaminants and preventing sludge buildup that can lead to engine damage.

Another important aspect is the oil’s ability to form a protective film on engine components. This film minimizes direct metal-to-metal contact, safeguarding parts like pistons and bearings. Engine oil also contains additives that enhance its properties; these can include detergents, anti-wear agents, and viscosity index improvers. These additives ensure that the oil maintains its effectiveness across a range of temperatures and conditions, further contributing to engine reliability.

undefined

This final section summarizes the key points regarding how engine oil functions within an engine. Understanding these concepts enables vehicle owners to make informed decisions about oil maintenance, selection, and overall vehicle care.

Engine oil serves several critical functions: it lubricates engine components, reduces friction, cleans contaminants, cools engine parts, and protects against corrosion. The viscosity of oil ensures it flows efficiently at different temperatures, maintaining a consistent film between moving parts. Regular oil changes are essential to remove accumulated dirt and debris, preventing engine wear and maintaining optimal performance.

Choosing the correct oil type, whether conventional, synthetic, or a blend, is crucial for engine health. Each type has unique properties tailored to specific engine requirements and operating conditions. Checking the oil level and quality regularly can help identify potential issues early, ensuring that the engine runs smoothly and efficiently.

By understanding how engine oil works, vehicle owners can better appreciate the importance of routine maintenance and the role oil plays in extending the lifespan of their engines. This knowledge ultimately contributes to better performance, efficiency, and reliability of the vehicle.

Quick Summary

  • Engine oil lubricates the moving parts of the engine, reducing friction and wear.
  • It helps to cool the engine by carrying heat away from critical components.
  • Engine oil cleans the engine by suspending dirt and debris, preventing buildup.
  • It provides a seal between the piston rings and cylinder walls, improving efficiency.
  • Oil additives enhance performance, providing protection against oxidation and corrosion.
  • Regular oil changes are essential to maintain engine health and performance.
  • Different types of oil (synthetic, conventional, and blend) are designed for various engine needs.

Frequently Asked Questions

1. What is engine oil and why is it important?

Engine oil is a lubricant that reduces friction between the moving parts of an engine. It helps to keep the engine clean, reduces wear and tear, and prevents overheating by dissipating heat.

2. How does engine oil lubricate the engine components?

Engine oil circulates throughout the engine via an oil pump, coating the metal surfaces of engine components. This layer of oil creates a barrier that minimizes direct contact between parts, reducing friction and wear.

3. What are the different types of engine oil?

There are three main types of engine oil: conventional, synthetic, and synthetic blend. Conventional oil is derived from crude oil, synthetic oil is chemically engineered for better performance, and synthetic blends combine both for enhanced protection.

4. How often should I change my engine oil?

It is generally recommended to change your engine oil every 3,000 to 7,500 miles, depending on the type of oil used and the manufacturer’s guidelines. Regular oil changes help maintain engine performance and longevity.

5. What happens if I don’t change my engine oil?

Neglecting to change your engine oil can lead to increased engine wear, sludge buildup, and overheating. Over time, this can result in reduced engine performance and potentially costly repairs.

Car Batteries 101: Types, Functions, and Maintenance Tips

Understanding car batteries is essential for any vehicle owner. These power sources are crucial for starting engines and powering electrical systems. By grasping their function and maintenance, you can ensure your car runs smoothly and avoid unexpected failures on the road.

Car batteries store and supply electrical energy to start your vehicle. They require regular maintenance to prolong their lifespan. Key aspects include understanding battery types, charging methods, and signs of wear that indicate a need for replacement.

undefined

This section provides an overview of car batteries, their importance, and how they function. Understanding the basics of car batteries is crucial for anyone looking to maintain their vehicle or diagnose issues related to electrical systems. Car batteries are essential for starting engines, powering electrical components, and providing energy when the alternator is not functioning.

Car batteries primarily use lead-acid chemistry, consisting of lead dioxide and sponge lead, immersed in sulfuric acid. This combination enables the battery to store and release electrical energy. The two main types of car batteries are flooded lead-acid batteries and sealed lead-acid batteries, including Absorbent Glass Mat (AGM) and gel batteries. Flooded batteries are typically less expensive and more commonly used, while sealed batteries offer better performance in extreme conditions and require less maintenance.

Battery capacity is measured in amp-hours (Ah), indicating how much current a battery can provide over a specific period. The cold cranking amps (CCA) rating indicates the battery’s ability to start an engine in cold temperatures. A higher CCA rating is beneficial for vehicles in colder climates. Proper maintenance, including regular checks and cleaning of terminals, can prolong battery life and ensure reliable performance.

undefined

This section focuses on understanding the types of car batteries available and their respective characteristics. Different types of batteries are designed to meet varying performance needs, and knowing these can help in choosing the right one for your vehicle.

Car batteries primarily fall into two categories: lead-acid batteries and lithium-ion batteries. Lead-acid batteries are the most common type, used in most vehicles. They consist of lead plates and sulfuric acid, providing reliable performance and affordability. However, they are heavier and have a shorter lifespan compared to lithium-ion batteries.

Lithium-ion batteries, on the other hand, are increasingly used in electric vehicles and hybrids. They are lighter, more efficient, and offer a longer lifespan. These batteries charge faster and provide better performance in extreme weather conditions. However, they come with a higher price tag.

Each battery type has its advantages and disadvantages. Lead-acid batteries are ideal for conventional vehicles due to their cost-effectiveness, while lithium-ion batteries are preferred for advanced tech vehicles due to their efficiency and longevity. Understanding these differences helps in making an informed choice based on your vehicle’s needs.

undefined

Understanding the types of car batteries is crucial for selecting the right one for your vehicle. Each type has specific characteristics that affect its performance and suitability for different driving conditions. This section outlines the main types of car batteries and their unique features.

The most common types of car batteries include:

  • Lead-Acid Batteries: These are the traditional batteries found in most vehicles. They are reliable, cost-effective, and provide a high burst of energy required for starting the engine. Lead-acid batteries can be further classified into two types: flooded and sealed (AGM and gel).
  • Lithium-Ion Batteries: Increasingly popular in electric vehicles, lithium-ion batteries are lightweight, have a high energy density, and can be charged quickly. They offer longer life cycles compared to lead-acid batteries but are also more expensive.
  • Nickel-Metal Hydride (NiMH) Batteries: Commonly used in hybrid vehicles, NiMH batteries provide a good balance between performance and cost. They are less efficient than lithium-ion but more efficient than lead-acid batteries.

Choosing the right battery type depends on your vehicle’s requirements and your driving habits. Understanding these options helps ensure you select a battery that meets your needs for performance and longevity.

undefined

Understanding the different types of car batteries is essential for making informed choices regarding battery replacement and maintenance. Each type has unique characteristics, advantages, and disadvantages that affect performance and longevity.

The most common types of car batteries include:

  • Lead-Acid Batteries: These are the traditional batteries used in most vehicles. They are reliable and cost-effective but heavier and less efficient in extreme temperatures.
  • Absorbent Glass Mat (AGM) Batteries: AGM batteries are more advanced and provide better performance, especially for vehicles with high electrical demands. They are sealed and maintenance-free but come at a higher price point.
  • Gel Cell Batteries: These batteries use a silica gel to immobilize the electrolyte, making them spill-proof. They are better for deep cycling but can be sensitive to charging voltages.
  • Lithium-Ion Batteries: Increasingly popular in electric vehicles, lithium-ion batteries are lightweight and have a high energy density. They are more expensive and require specific charging systems.

Selecting the right battery depends on your vehicle type, driving habits, and climate. Understanding the pros and cons of each type can help you make an informed decision for optimal vehicle performance.

undefined

Understanding the various types of car batteries is essential for vehicle maintenance and performance. Each type of battery is designed with specific applications and characteristics that make them suitable for different vehicles and driving conditions. This section provides an overview of the most common types of car batteries.

The three primary types of car batteries are lead-acid, absorbed glass mat (AGM), and lithium-ion batteries.

  • Lead-Acid Batteries: These are the most common and affordable type. They consist of lead plates and sulfuric acid. They are reliable for starting vehicles but may require more maintenance and have a shorter lifespan compared to other types.
  • Absorbed Glass Mat (AGM) Batteries: AGM batteries are sealed and maintenance-free, making them ideal for modern vehicles with advanced electrical systems. They are more expensive but offer better performance, longer life, and faster recharging capabilities.
  • Lithium-Ion Batteries: Increasingly used in electric vehicles, lithium-ion batteries are lightweight and have a high energy density. They have a long lifespan and require minimal maintenance, though they come with a higher initial cost.

Choosing the right battery type depends on your vehicle’s requirements, driving habits, and budget. Understanding these options can help ensure you select the most suitable battery for your needs.

undefined

Understanding the lifespan and maintenance of car batteries is crucial for ensuring their longevity and optimal performance. This section covers factors influencing battery life, signs of battery deterioration, and essential maintenance tips to keep your battery in top condition.

Car batteries typically last between three to five years, depending on usage and environmental conditions. Extreme temperatures, frequent short trips, and excessive electrical accessory usage can shorten a battery’s lifespan. Regular checks can help identify issues before they lead to failure.

Signs of a weakening battery include slow engine cranking, dimming headlights, and warning lights on the dashboard. If a battery shows signs of swelling or corrosion around terminals, it may need replacing. Regular maintenance, such as cleaning terminals, ensuring tight connections, and checking electrolyte levels in non-maintenance-free batteries, can prolong battery life.

Additionally, consider investing in a battery tester to monitor health regularly. Many automotive shops offer free battery checks, which can be a proactive way to avoid unexpected failures. Following these guidelines will help ensure your car battery operates efficiently and lasts as long as possible.

undefined

Understanding the maintenance and care of car batteries is essential for ensuring their longevity and optimal performance. This section focuses on practical steps you can take to extend the life of your car battery and prevent common issues that may arise.

Regular maintenance begins with checking the battery terminals for corrosion. Clean any buildup with a mixture of baking soda and water, ensuring the connections are tight and secure. Additionally, inspect the battery case for any cracks or leaks, as these can indicate a failing battery.

Monitoring the battery charge is crucial. Use a multimeter to check the voltage; a healthy battery should read around 12.6 volts or more when fully charged. If voltage drops below 12.4 volts, consider recharging or testing the battery’s capacity.

Temperature can also affect battery performance. Extreme heat can accelerate battery fluid evaporation, while cold temperatures can decrease battery efficiency. Parking in a garage or using a battery blanket in colder months can help mitigate these effects.

Lastly, consider routine professional checks, especially before long trips. Many auto shops offer battery testing services that can identify potential issues early, allowing for timely replacements or repairs.

undefined

This section focuses on understanding the differences between various types of car batteries and their specific applications. Knowledge of these differences helps in selecting the right battery for your vehicle, ensuring optimal performance and longevity.

Car batteries mainly fall into two categories: lead-acid and lithium-ion. Lead-acid batteries are the most common type used in conventional vehicles. They are reliable and cost-effective but have limitations in terms of weight and energy density. Within lead-acid batteries, there are two main types: traditional flooded batteries and sealed maintenance-free batteries. Flooded batteries require regular maintenance, while sealed batteries are more convenient as they do not need water refilling.

Lithium-ion batteries are becoming increasingly popular, especially in hybrid and electric vehicles. They offer higher energy density, lighter weight, and longer cycle life compared to lead-acid batteries. However, they are more expensive and require specific charging systems. Understanding these differences, along with the specific needs of your vehicle, can guide you in selecting the appropriate battery type.

undefined

This final section summarizes key points about car batteries, emphasizing practical knowledge for maintenance and selection. Understanding these aspects will facilitate informed decisions regarding car battery care and replacement.

Choosing the right car battery involves considering factors such as compatibility, capacity, and warranty. Always consult your vehicle’s manual to find specifications that match your needs. Car batteries come in different types, including lead-acid, AGM (Absorbent Glass Mat), and lithium-ion. Each type has unique advantages, such as weight, discharge rates, and longevity.

Regular maintenance can extend battery life. Keep terminals clean and free from corrosion, and ensure connections are tight. Check the battery charge periodically, especially before long trips or during extreme weather conditions. If a battery shows signs of aging—such as slow engine cranking or dim headlights—it may be time for replacement.

Recycling old car batteries is crucial for environmental protection. Most auto parts stores offer battery recycling programs. Proper disposal prevents harmful chemicals from entering the ecosystem, supporting sustainable practices in the automotive industry.

By understanding these essentials, you can ensure your car battery operates efficiently, ultimately enhancing your vehicle’s performance and reliability.

Quick Summary

  • Car batteries store and supply electrical energy to start the engine and power electrical components.
  • The most common type of car battery is the lead-acid battery, known for its reliability and affordability.
  • Car batteries typically have a lifespan of 3 to 5 years, depending on usage and environmental conditions.
  • Regular maintenance, such as checking fluid levels and cleaning terminals, can extend battery life.
  • Temperature extremes can significantly affect battery performance; cold weather can reduce capacity while heat can accelerate wear.
  • Signs of a failing battery include slow engine crank, dim lights, and electrical issues.
  • Proper disposal and recycling of old batteries are crucial to prevent environmental harm.

Frequently Asked Questions

What is a car battery and how does it work?

A car battery is a rechargeable energy storage device that provides electrical power to start the engine and power the vehicle’s electrical systems. It works by converting chemical energy into electrical energy through a series of chemical reactions within its cells.

How long do car batteries typically last?

On average, car batteries last between 3 to 5 years, depending on factors such as climate, driving habits, and maintenance. Regular checks and timely replacements can help ensure optimal performance and prevent unexpected failures.

What are the signs that my car battery is failing?

Common signs of a failing car battery include slow engine cranking, dim headlights, and electrical issues in the vehicle. If you notice any of these symptoms, it’s advisable to have your battery tested or replaced promptly.

Can I jump-start a dead car battery?

Yes, you can jump-start a dead car battery using jumper cables and a working vehicle. However, it’s important to follow proper safety procedures, including connecting the cables in the correct order to avoid damage to the vehicles.

How can I extend the life of my car battery?

To extend your car battery’s life, ensure that it is securely mounted, keep the terminals clean and free of corrosion, and regularly check its charge level. Additionally, avoid short trips and turn off electrical accessories when the engine is not running.

Automotive Batteries Explained: Types, Functions & Key Features

Understanding automotive batteries is essential for anyone interested in cars. These power sources are not just components; they are the lifeblood of vehicles, influencing performance and reliability. Knowing how they work and their types can significantly enhance your automotive knowledge.

Automotive batteries serve as the main power source for vehicles, providing energy for starting engines and powering electrical systems. Key types include lead-acid, lithium-ion, and AGM batteries, each with unique features and applications.

Core Function of Batteries

Automotive batteries are essential components in vehicles, serving primarily as energy storage devices. They store electrical energy generated by the alternator and provide power for starting the engine and operating electrical systems when the engine is not running.

These batteries are designed to deliver a quick burst of energy to start the engine, which requires significant power. Once the engine is running, the alternator takes over, replenishing the battery and supplying power to the vehicle’s electrical systems, such as lights, radio, and air conditioning. The ability to store energy efficiently and provide reliable power is critical for the overall functionality of modern vehicles.

In addition to starting the engine, automotive batteries also act as a stabilizer for voltage fluctuations in the electrical system. This ensures that sensitive electronic components receive a consistent voltage, thereby prolonging their lifespan and enhancing vehicle performance.

Battery Chemistry Basics

Understanding the chemical reactions that power automotive batteries is crucial for grasping how they function. These reactions involve the movement of electrons and ions, which facilitate the conversion of chemical energy into electrical energy. Two common types of automotive batteries are lead-acid and lithium-ion, each employing different chemical processes.

Electrochemical Reactions

Electrochemical reactions in batteries occur at the electrodes, where oxidation and reduction take place. In a lead-acid battery, the positive plate consists of lead dioxide (PbO2), while the negative plate is made of sponge lead (Pb). During discharge, lead dioxide reacts with sulfuric acid (H2SO4), leading to the formation of lead sulfate (PbSO4) and water, releasing energy. Conversely, during charging, the reaction reverses, regenerating lead dioxide and lead.

Lithium-ion batteries, commonly used in modern electric vehicles, utilize lithium compounds for their electrodes. The positive electrode is typically lithium cobalt oxide (LiCoO2), while the negative electrode is made of graphite. During discharge, lithium ions move from the anode to the cathode, producing electrical energy. Charging reverses this process, with lithium ions migrating back to the anode.

These electrochemical processes are fundamental to battery performance, efficiency, and longevity, making them essential knowledge for anyone interested in automotive battery technology.

Key Battery Components

Understanding the key components of automotive batteries is essential for grasping how they function and contribute to vehicle performance. Each part plays a crucial role in generating and storing electrical energy required for starting the engine and powering electrical systems.

Electrolyte

The electrolyte in an automotive battery is a solution of sulfuric acid and water. It facilitates the chemical reactions that occur between the electrodes during discharging and charging. The concentration of the electrolyte affects the battery’s efficiency and performance. Proper maintenance of the electrolyte level is vital for optimal battery function.

Electrodes

Electrodes are the conductive materials within the battery that participate in the electrochemical reactions. Automotive batteries typically have two types of electrodes: the positive electrode (cathode) made of lead dioxide and the negative electrode (anode) made of sponge lead. These electrodes store and release electrical energy during operation.

Separator

The separator is a critical component that prevents direct contact between the positive and negative electrodes, which could cause a short circuit. It allows ions to pass through while maintaining the integrity of the battery structure. Made from porous materials, the separator ensures that the electrochemical reactions occur efficiently without risk of failure.

Battery Maintenance Techniques

Proper maintenance of automotive batteries is essential for ensuring longevity and reliability. Regular inspections and cleaning can prevent issues and enhance performance. Below are effective methods to maintain your battery.

Regular Inspections

Conduct visual inspections of the battery at regular intervals. Look for signs of corrosion, cracks, or leaks. Ensure that the battery terminals are secured and free from damage. Check the fluid levels in non-maintenance-free batteries; low levels can lead to poor performance. Testing the battery’s voltage with a multimeter can also indicate its health. Ideally, a fully charged battery should read around 12.6 volts or more.

Cleaning Terminals

Cleansing the battery terminals is crucial for maintaining a good connection. Corrosion can build up over time, impacting performance. Use a mixture of baking soda and water to clean the terminals. Apply the solution with a brush, scrubbing away any buildup. After cleaning, rinse with water and dry thoroughly to prevent moisture accumulation. Once dry, apply a thin layer of petroleum jelly to the terminals to reduce future corrosion.

Charging Methods Explained

Understanding the various charging methods for automotive batteries is crucial for maintaining their performance and longevity. Different techniques cater to specific situations, ensuring that batteries are charged efficiently and effectively.

Trickle Charging

Trickle charging is a low-current charging method that maintains a battery’s charge without overcharging it. This technique is often used for batteries that are not in regular use, such as those in classic cars or seasonal vehicles. By delivering a steady, low-level charge, trickle chargers keep the battery topped off without damaging it. This method is particularly beneficial in preventing sulfation, a common issue in lead-acid batteries when they are left in a discharged state for extended periods.

Fast Charging

Fast charging, on the other hand, delivers a higher current to charge the battery quickly. This method is commonly employed in emergency situations or when time constraints exist. While fast charging can significantly reduce the time needed to restore a battery to full capacity, it can generate heat, which may adversely affect battery life if not monitored properly. Many modern chargers have built-in safety features to regulate temperature and prevent damage during fast charging sessions.

Comparing Battery Types

This section analyzes the key differences between various automotive battery types, focusing on their construction, performance, and applications. Understanding these distinctions will help in selecting the right battery for specific automotive needs.

Lead-Acid Batteries are the most traditional and widely used type in automotive applications. They are affordable and reliable, making them ideal for starting engines. However, they are heavy and have a limited lifecycle, typically lasting 3-5 years. Their performance can also be affected by temperature extremes.

Lithium-Ion Batteries have gained popularity in electric vehicles due to their superior energy density and lighter weight. They can last significantly longer than lead-acid batteries, often exceeding 10 years. However, they come at a higher cost and require sophisticated management systems to ensure safety and efficiency.

Nickel-Metal Hydride (NiMH) Batteries are commonly used in hybrid vehicles. They offer a balance between performance and cost, providing better energy storage than lead-acid batteries while being less expensive than lithium-ion. Their lifecycle is generally within the range of 5-10 years, but they can be less efficient in cold weather.

Choosing the right battery type depends on factors such as vehicle requirements, budget, and intended use. Each battery type has its strengths and weaknesses that should be carefully considered.

Real-World Battery Applications

This section highlights the practical applications of various battery types in automotive settings, focusing on their roles in enhancing vehicle performance and efficiency. Understanding these applications provides insight into how batteries contribute to modern automotive technologies.

  1. Start-Stop Systems: Many new vehicles feature start-stop technology, which automatically shuts off the engine when the car is idling and restarts it when the driver releases the brake. This system reduces fuel consumption and emissions. Advanced lead-acid batteries or absorbed glass mat (AGM) batteries are commonly used here due to their ability to handle frequent cycling.
  2. Electric Vehicles (EVs): EVs rely on high-capacity lithium-ion batteries to power electric motors. These batteries provide the energy needed for long-range travel and fast acceleration. They are designed for optimal performance, longevity, and efficiency, with advanced thermal management systems to maintain safe operating temperatures.
  3. Hybrid Vehicles: Hybrids combine traditional internal combustion engines with electric power. They utilize both a gasoline engine and a smaller battery pack, typically a nickel-metal hydride (NiMH) battery, to improve fuel efficiency. The electric motor assists during acceleration and recaptures energy during braking.
  4. Accessory Power: Batteries also power electronic accessories in vehicles, such as infotainment systems, navigation, and lighting. Standard lead-acid batteries supply this power, ensuring that these systems operate effectively without draining the main battery used for starting the engine.

Quick Summary

  • Automotive batteries provide the electrical energy necessary to start a vehicle and power its electrical systems.
  • The most common type of automotive battery is the lead-acid battery, which uses lead dioxide and sponge lead as electrodes.
  • Battery capacity is measured in amp-hours (Ah), indicating how much current a battery can provide over a specific period.
  • Modern vehicles may also use lithium-ion batteries, especially in hybrid and electric vehicles, due to their higher energy density and lighter weight.
  • Battery maintenance can include checking fluid levels, cleaning terminals, and ensuring proper charging to extend battery life.
  • Cold temperatures can significantly affect battery performance, reducing its ability to hold a charge and deliver power.
  • Proper disposal and recycling of automotive batteries are crucial due to their toxic components and environmental impact.

Frequently Asked Questions

What is an automotive battery and how does it work?

An automotive battery is a rechargeable energy storage device that provides electrical power to start the engine and run electrical components in a vehicle. It works by converting chemical energy into electrical energy through a series of electrochemical reactions.

What are the different types of automotive batteries?

The most common types of automotive batteries are lead-acid, absorbed glass mat (AGM), and lithium-ion batteries. Lead-acid batteries are widely used due to their cost-effectiveness, while AGM batteries are known for their durability and resistance to vibration. Lithium-ion batteries are becoming popular in electric vehicles due to their lighter weight and higher energy density.

How long do automotive batteries typically last?

On average, automotive batteries last between three to five years, depending on usage and environmental factors. Extreme temperatures, frequent short trips, and lack of maintenance can shorten their lifespan.

What are the signs that my automotive battery needs to be replaced?

Common signs that your automotive battery may need replacement include slow engine cranking, dimming headlights, and electrical issues with accessories. If you notice any of these symptoms or if your battery is older than three years, it’s a good idea to have it tested.

How can I maintain my automotive battery for longevity?

To maintain your automotive battery, keep the terminals clean and free of corrosion, ensure it is securely mounted, and check the fluid levels if applicable. Regularly driving your vehicle also helps to keep the battery charged and in good condition.

5W30 Engine Oil: Benefits, Specs, and Best Uses for Your Car

Understanding car engine oil is essential for maintaining your vehicle’s performance and longevity. One popular option is 5W30 oil, which plays a crucial role in engine protection, efficiency, and overall function. Knowing how it works can save you time and money in the long run.

5W30 oil is suitable for a variety of temperatures, offering excellent engine protection and fuel efficiency. Its viscosity rating indicates that it flows well at low temperatures while maintaining performance at higher temperatures, making it a versatile choice for many vehicles.

Definition of 5W30 Oil

5W30 oil is a multi-viscosity engine oil that is commonly used in various vehicles. The “5W” indicates the oil’s viscosity at low temperatures, while “30” refers to its viscosity at high temperatures. This oil is designed to provide reliable lubrication and protection for engine components under different operating conditions.

5W30 oil is particularly popular because it balances performance in both cold and warm climates. Its lower viscosity at startup ensures that the engine receives adequate lubrication quickly, reducing wear during cold starts. Conversely, its higher viscosity at operating temperatures helps maintain a protective film over engine components, enhancing performance and fuel efficiency. Many vehicle manufacturers recommend 5W30 oil due to its ability to adapt to varying temperatures, making it a versatile choice for drivers.

Viscosity Explained

Viscosity plays a crucial role in the performance of engine oils, including 5W30. It determines how well the oil flows at various temperatures, affecting lubrication, engine efficiency, and overall performance. Understanding viscosity is essential for optimal engine operation.

  1. Low-temperature performance: The “5W” in 5W30 indicates the oil’s viscosity at low temperatures. It flows easily in cold conditions, ensuring that the engine receives adequate lubrication during startup. This is vital for reducing wear and tear on engine components.
  2. High-temperature performance: The “30” signifies the oil’s viscosity at high operating temperatures. At elevated temperatures, 5W30 maintains its thickness, providing a protective film over moving parts. This prevents metal-to-metal contact, which can lead to engine damage.
  3. Engine efficiency: Proper viscosity ensures that the oil circulates efficiently, reducing friction between engine parts. This efficiency contributes to better fuel economy and improved engine performance.
  4. Oil breakdown resistance: The right viscosity helps the oil resist breakdown over time, maintaining its protective qualities longer. This leads to extended oil change intervals and better overall engine health.

Key Additives in 5W30

5W30 engine oil is formulated with various additives that enhance its performance and longevity. These additives play crucial roles in ensuring that the oil provides optimal protection, performance, and efficiency for your engine.

Key additives include:

  • Detergents: These help keep engine parts clean by preventing the formation of sludge and varnish. They neutralize acids that can form over time, ensuring a cleaner engine and improved performance.
  • Dispersants: Similar to detergents, dispersants help to keep contaminants suspended in the oil, preventing them from settling on engine components. This promotes better oil cleanliness and overall engine health.
  • Anti-wear agents: These additives, such as zinc dialkyldithiophosphate (ZDDP), form a protective film on metal surfaces to reduce friction and wear during engine operation, extending the life of engine parts.
  • Viscosity index improvers: These additives help maintain the oil’s viscosity across a range of temperatures, ensuring the oil remains effective in both cold starts and high-temperature conditions.
  • Anti-foaming agents: These reduce the formation of foam in the oil, which can lead to air pockets and decreased lubrication efficiency. This ensures consistent oil flow and protection of engine components.
  • Corrosion inhibitors: These protect against rust and corrosion, especially in humid conditions or when the engine is not in use for extended periods.

The combination of these additives makes 5W30 oil versatile and effective for a wide range of driving conditions and engine types.

Recommended Uses of 5W30

5W30 engine oil is versatile and suitable for a wide range of vehicles. Its properties make it particularly effective in various driving conditions, ensuring optimal engine performance and protection. Understanding where and how to use it can significantly enhance vehicle longevity and efficiency.

This oil grade is commonly recommended for modern gasoline-powered vehicles, including sedans, SUVs, and light trucks. It is especially beneficial for engines designed to operate with lower viscosity oils, providing better fuel efficiency and improved cold start performance. Vehicles operating in moderate climates, where temperatures do not frequently drop below freezing, will also benefit from 5W30’s balanced viscosity.

For those who frequently drive in stop-and-go traffic, 5W30 offers excellent wear protection, reducing engine strain. Additionally, it performs well in highway conditions, allowing for smooth operation at higher RPMs. However, it’s essential to consult the vehicle’s owner manual to confirm compatibility, as some high-performance or heavy-duty engines may require specialized oil grades.

Changing 5W30 Oil Procedure

This section provides a clear, step-by-step guide on how to change 5W30 oil in your vehicle. Following these instructions will help ensure that you perform the oil change correctly and maintain your engine’s performance.

  1. Gather Supplies: Before starting, collect all necessary tools and materials, including a new oil filter, 5W30 oil, an oil catch pan, a wrench, and a funnel.
  2. Warm Up the Engine: Run the engine for a few minutes to warm the oil. Warm oil drains more easily than cold oil.
  3. Lift the Vehicle: Use ramps or a jack to elevate the vehicle, ensuring it’s secure and stable.
  4. Drain Old Oil: Place the oil catch pan under the oil pan. Remove the drain plug using a wrench, allowing the old oil to flow into the pan completely.
  5. Replace Oil Filter: Use an oil filter wrench to remove the old oil filter. Apply a bit of new oil to the rubber gasket of the new filter, then install it by hand.
  6. Add New Oil: Replace the drain plug securely and remove the oil fill cap. Using a funnel, pour in the new 5W30 oil as specified in your owner’s manual.
  7. Check Oil Level: After adding oil, wait a few minutes, then check the oil dipstick to ensure the level is within the recommended range.
  8. Dispose of Old Oil: Properly dispose of the old oil and filter at a recycling center or an auto parts store that accepts used oil.

5W30 vs Other Oils

5W30 oil is commonly used in many vehicles due to its balanced viscosity characteristics, making it suitable for a wide range of temperatures. Comparing it with other oil grades highlights its strengths and weaknesses, allowing you to make informed decisions about your engine’s lubrication needs.

  • 5W30 vs 10W30: Both oils are similar in viscosity at operating temperatures, but 5W30 performs better in colder conditions due to its lower winter rating, making it ideal for cold starts.
  • 5W30 vs 5W20: 5W20 has a lower viscosity, providing better fuel efficiency but may offer less protection under high-stress conditions compared to 5W30, which maintains better stability at higher temperatures.
  • 5W30 vs 10W40: 10W40 is thicker at high temperatures, which can offer better protection in hotter climates but may lead to decreased fuel economy and harder starts in cold weather compared to 5W30.
  • 5W30 vs Synthetic Oils: Synthetic variants of 5W30 provide superior performance in extreme temperatures and longer intervals between changes, reducing engine wear compared to conventional 5W30 oils.

Understanding these comparisons helps in selecting the right oil for your vehicle, balancing performance, protection, and efficiency based on your driving conditions.

Quick Summary

  • 5W30 is a multi-viscosity oil suitable for a wide range of temperatures.
  • The “5” indicates the oil’s viscosity at low temperatures, ensuring easy engine start-up.
  • The “30” indicates viscosity at higher temperatures, providing adequate protection during engine operation.
  • Commonly recommended for modern gasoline engines, but can also be used in diesel engines.
  • Helps improve fuel efficiency and reduce engine wear over time.
  • Available in synthetic, conventional, and blended formulations, offering flexibility for different needs.
  • Regularly checking and changing oil can enhance engine performance and longevity.

Frequently Asked Questions

What does 5W30 mean in engine oil?

The “5W” indicates the oil’s viscosity at low temperatures, with “W” standing for winter. The “30” denotes the oil’s viscosity at high temperatures. This means 5W30 oil is suitable for colder starting conditions while maintaining effective performance in warmer temperatures.

What are the benefits of using 5W30 oil?

5W30 oil provides excellent engine protection and fuel efficiency across a wide range of temperatures. It helps reduce engine wear during cold starts and maintains optimal lubrication at higher temperatures, making it a versatile choice for many vehicles.

Is 5W30 oil suitable for all vehicles?

Not all vehicles require 5W30 oil; it’s essential to check your owner’s manual for the manufacturer’s specifications. Some engines may require different viscosity oils based on their design and operating conditions.

How often should I change 5W30 engine oil?

The general recommendation is to change your oil every 5,000 to 7,500 miles, but this can vary based on driving habits and conditions. Always refer to your vehicle’s manual for the specific oil change interval for optimal performance.

Can I mix 5W30 with other oil viscosities?

While it’s technically possible to mix different viscosities, it’s not recommended as it can compromise the oil’s performance and protective qualities. If you need to top off your oil, it’s best to use the same viscosity and type as specified in your vehicle’s manual.

Car Cooling System Diagram: Key Components & Layout Explained

Understanding how your car’s cooling system works is crucial for maintaining its performance and longevity. A well-functioning cooling system prevents overheating and ensures your engine runs efficiently. Let’s break down the essential components of this system and how they work together to keep your vehicle cool.

The car cooling system regulates engine temperature through coolant circulation, involving parts like the radiator, water pump, and thermostat. Familiarity with these components can help you identify issues early, ensuring your vehicle runs smoothly and efficiently.

undefined

The car cooling system is crucial for maintaining optimal engine temperature and preventing overheating. Understanding its components and their functions is essential for effective maintenance and troubleshooting. This section will introduce the specific parts of the cooling system as depicted in a typical car cooling system diagram.

A standard car cooling system diagram includes several key components: the radiator, water pump, thermostat, coolant reservoir, and hoses. The radiator dissipates heat from the coolant, which absorbs engine heat. The water pump circulates the coolant through the engine and back to the radiator. The thermostat regulates the flow of coolant based on the engine temperature, ensuring it operates within the ideal range. The coolant reservoir holds excess coolant, allowing for expansion and contraction during heating and cooling cycles.

Understanding these components in the context of the diagram allows for better insights into how the cooling system operates and how each part interacts with the others to maintain engine efficiency.

undefined

This section focuses on the essential components of a car cooling system diagram. Understanding these parts is crucial for diagnosing issues and ensuring optimal vehicle performance. Each component plays a specific role in maintaining the engine’s temperature and preventing overheating.

The primary elements of a car cooling system include:

  • Radiator: Cools the coolant before it returns to the engine.
  • Water Pump: Circulates coolant throughout the engine and radiator.
  • Thermostat: Regulates coolant flow based on the engine temperature.
  • Coolant Reservoir: Holds excess coolant and maintains system pressure.
  • Hoses: Transport coolant between the engine, radiator, and other components.
  • Fan: Assists in cooling the radiator by drawing air through it.

Each of these components is depicted in a typical cooling system diagram, showcasing how they connect and interact to maintain the engine’s optimal operating temperature. Understanding the layout and function of these parts enables effective troubleshooting and maintenance.

undefined

Understanding the components of a car cooling system is essential for effective maintenance and troubleshooting. This section focuses on the key elements that comprise the cooling system, highlighting their functions and how they interconnect within the overall system.

The main components of a car cooling system include the radiator, water pump, thermostat, coolant reservoir, and hoses. Each part plays a vital role in regulating engine temperature. The radiator dissipates heat from the coolant, while the water pump circulates the coolant throughout the engine and cooling system. The thermostat controls the flow of coolant, ensuring that the engine reaches optimal operating temperature before allowing coolant to flow to the radiator.

Additionally, hoses connect these components, facilitating the movement of coolant between the engine, radiator, and reservoir. The coolant reservoir stores excess coolant and helps maintain the correct fluid level in the system, preventing overheating. Understanding how these parts work together is crucial for diagnosing cooling system issues and ensuring reliable vehicle performance.

undefined

Understanding the components and layout of a car cooling system is essential for effective maintenance and troubleshooting. This section will outline the main parts depicted in a typical car cooling system diagram, providing clarity on how they interact to prevent engine overheating.

The primary components include the radiator, water pump, thermostat, hoses, and cooling fan. The radiator dissipates heat from the coolant, which circulates through the engine. The water pump is crucial for moving the coolant through the system, ensuring it reaches all necessary areas. The thermostat regulates the coolant flow based on temperature, maintaining optimal engine heat levels.

Hoses connect these components, allowing the coolant to flow between the engine, radiator, and other parts. The cooling fan aids in airflow through the radiator, especially when the vehicle is stationary or moving at low speeds. Understanding the layout and function of these components helps in identifying potential issues and performing maintenance effectively.

undefined

This section focuses on the components of the car cooling system as illustrated in the diagram, detailing their functions and interconnections. Understanding these elements is essential for diagnosing issues or performing maintenance effectively.

The car cooling system mainly consists of the radiator, water pump, thermostat, hoses, and cooling fans. Each part plays a critical role in regulating engine temperature and preventing overheating.

  • Radiator: This component dissipates heat from the coolant, allowing it to cool before re-entering the engine.
  • Water Pump: Circulates coolant throughout the engine and back to the radiator, ensuring consistent temperature control.
  • Thermostat: Regulates the flow of coolant based on the engine’s temperature, opening or closing to maintain optimal operating conditions.
  • Hoses: Connect different parts of the cooling system, transporting coolant between the engine, radiator, and other components.
  • Cooling Fans: Activate to increase airflow through the radiator, especially during idling or slow speeds when natural airflow is insufficient.

Each component is depicted in the diagram, showing how they interact to maintain engine temperature and prevent overheating. Familiarity with these parts enhances troubleshooting and maintenance capabilities.

undefined

This section focuses on understanding the car cooling system diagram in detail. A clear diagram highlights the components and their interconnections within the system, allowing for easier troubleshooting and maintenance. Familiarity with this diagram enhances your ability to identify issues and understand how the cooling system maintains engine temperature.

The car cooling system diagram typically includes the following key components:

  • Radiator: Helps dissipate heat from the coolant.
  • Water Pump: Circulates coolant throughout the engine and radiator.
  • Thermostat: Regulates coolant flow based on engine temperature.
  • Coolant Reservoir: Holds excess coolant and helps maintain system pressure.
  • Hoses: Transport coolant between components.
  • Engine Block: Where coolant absorbs heat from the engine.

Understanding the layout of these elements helps identify where blockages or leaks may occur. For example, a coolant leak can often be traced back to a hose or the radiator itself. Familiarity with the diagram not only aids in troubleshooting but also informs routine maintenance, ensuring optimal performance of the cooling system.

undefined

This final section summarizes the key components of a car cooling system diagram, emphasizing their interconnections and functions. Understanding these parts will help you visualize how the cooling system operates and maintain engine efficiency.

The car cooling system consists of several critical components, including the radiator, water pump, thermostat, and hoses. Each plays a vital role in regulating engine temperature. The radiator dissipates heat absorbed from the coolant, while the water pump circulates coolant throughout the engine. The thermostat controls the flow of coolant based on temperature readings, ensuring optimal engine performance.

When referring to a cooling system diagram, it typically illustrates the flow of coolant through these components, highlighting the pathways and connections. This can be beneficial for troubleshooting issues, performing maintenance, or understanding how to optimize the system. If you identify a problem, such as overheating or leaks, consult the diagram to pinpoint the affected areas.

In conclusion, familiarizing yourself with the car cooling system diagram enhances your ability to maintain vehicle health. Regular inspections and understanding the flow of coolant can prevent engine damage and prolong the life of your car.

Quick Summary

  • The car cooling system regulates engine temperature to prevent overheating.
  • Main components include the radiator, water pump, thermostat, and coolant.
  • Coolant circulates through the engine and radiator to dissipate heat.
  • The thermostat controls the flow of coolant based on engine temperature.
  • Regular maintenance, including coolant checks, is essential for optimal performance.
  • Signs of cooling system failure include overheating, coolant leaks, and unusual engine noises.
  • A well-functioning cooling system enhances engine efficiency and longevity.

Frequently Asked Questions

What is a car cooling system diagram?

A car cooling system diagram is a visual representation that illustrates the components and flow of coolant in a vehicle’s cooling system. It typically includes elements such as the radiator, water pump, thermostat, and hoses, showing how coolant circulates to regulate engine temperature.

Why is the cooling system important for my car?

The cooling system is crucial because it prevents the engine from overheating, which can lead to severe damage or failure. By maintaining optimal operating temperatures, it ensures efficient performance and longevity of the engine.

What are the main components shown in a cooling system diagram?

Main components include the radiator, water pump, thermostat, coolant reservoir, and hoses. Each part plays a specific role in circulating coolant and dissipating heat from the engine.

How can I use a cooling system diagram to troubleshoot issues?

A cooling system diagram can help you identify potential problem areas by illustrating the flow of coolant and the location of components. By understanding how the system works, you can better diagnose issues like leaks, overheating, or coolant flow problems.

Where can I find a car cooling system diagram for my vehicle?

You can find car cooling system diagrams in your vehicle’s service manual, online automotive repair resources, or manufacturer websites. Many automotive forums and repair guides also share diagrams specific to various makes and models.

Resolve Mixing Engine Oil Issues: Tips for Optimal Performance

Mixing engine oils can seem straightforward, but many car owners overlook potential problems that arise from this practice. Understanding the nuances of engine oil compatibility is crucial for maintaining your vehicle’s health and performance. Are you ready to unravel the common issues associated with improper oil mixing?

Mixing engine oil can lead to increased wear, sludge buildup, and decreased lubrication. Knowing the right oil types and adhering to manufacturer recommendations can prevent costly repairs and maintain engine efficiency.

undefined

This section focuses on the common problems associated with mixing engine oils. Engine oil plays a crucial role in maintaining the performance and longevity of your vehicle. However, mixing different types or brands of engine oil can lead to various issues that may affect your engine’s efficiency and durability.

One of the primary concerns with mixing engine oils is the potential for chemical incompatibility. Different oils may contain varying additives that can react negatively when combined, leading to reduced lubrication properties. This can result in increased engine wear and overheating. Another issue is the viscosity of the oils; mixing oils with different viscosities can alter the intended flow characteristics, impacting oil pressure and overall engine function.

Furthermore, if the oils are of different bases, such as synthetic and conventional, the performance benefits of synthetic oils could be diminished. Engine manufacturers often recommend specific oil types for optimal performance, and deviating from these guidelines can void warranties. Understanding these potential problems is vital for maintaining a healthy engine and ensuring smooth operation.

undefined

This section focuses on the common problems associated with mixing different types or brands of engine oil. Understanding these issues is crucial for maintaining engine performance and longevity. Mixing oils can lead to various complications that may affect your vehicle’s operation.

One of the primary problems arises from the difference in oil formulations. Engine oils are typically classified into conventional, synthetic, and semi-synthetic types. Each type has a unique chemical composition, designed to perform under specific conditions. Mixing these oils can result in chemical reactions that may reduce the effectiveness of additives, leading to suboptimal lubrication and protection.

Another concern is the viscosity of the oils involved. Different oils have varying thickness (viscosity ratings), which can cause inconsistencies in how well the oil flows and adheres to engine components. This inconsistency can lead to inadequate lubrication, increasing wear and tear on engine parts.

Additionally, mixing oils can also lead to contamination. If one oil contains additives not present in another, the resulting mixture could create sludge or deposits that clog filters and passages within the engine. This can severely impair engine performance and may lead to costly repairs.

undefined

Identifying the symptoms of mixing engine oil is essential for maintaining your vehicle’s health. Recognizing these signs early can prevent serious engine damage. This section discusses common indicators that you may be experiencing problems due to mixing different types of engine oil.

One of the first symptoms is a change in engine performance. If your engine begins to run rough, misfire, or lacks power, this may be due to oil incompatibility affecting lubrication. Another key indicator is unusual engine noises. If you notice knocking, ticking, or a loud whining sound, it could signal inadequate lubrication caused by mixed oils.

Increased oil consumption is another critical sign. If you find yourself needing to add oil more frequently, it may indicate that your engine is struggling due to improper oil mixtures. Additionally, check for oil discoloration. When mixed oils are present, the oil can turn dark or appear milky, indicating contamination. Lastly, monitor for leaks or oil spots under your vehicle. Mixing oils can cause seal breakdowns, leading to leaks, which require immediate attention.

undefined

Identifying the signs of mixing engine oil problems is crucial for maintaining vehicle performance. This section discusses the common symptoms that indicate potential issues arising from mixing different types of engine oils. Recognizing these symptoms early can prevent severe engine damage and costly repairs.

One of the primary indicators of mixing engine oils is the change in oil color and consistency. If the oil appears milky or has a frothy texture, it may suggest contamination, often leading to serious engine problems. Additionally, unusual engine noises, such as knocking or ticking, can signal that the oil is not providing adequate lubrication due to improper mixing.

Another symptom is an increase in engine temperature. If your engine runs hotter than usual, it may indicate that the oil is unable to dissipate heat effectively. Frequent oil changes may also be necessary if you notice that the oil is breaking down faster than expected, which can be attributed to incompatible oil types.

Pay attention to the oil pressure gauge as well. If the oil pressure drops unexpectedly, it could mean that the oil’s viscosity has changed due to mixing. Regular monitoring of these symptoms can help maintain optimal engine health and longevity.

undefined

Identifying signs of mixing engine oil problems is crucial for maintaining vehicle health. Various symptoms can indicate that different oils have been mixed, leading to potential engine damage. Recognizing these signs early can save time and repair costs.

One common symptom is an unusual change in oil color or consistency. If the oil appears milky or has a frothy appearance, it may indicate contamination with water or coolant. This could be a result of mixing incompatible oils. Additionally, check for unusual engine noises; different viscosities can cause inadequate lubrication, resulting in knocking or ticking sounds.

Another indicator is the presence of sludge in the oil. If you notice a thick, dark substance in the oil fill cap or on the dipstick, this may result from incompatible oil mixing leading to the breakdown of oil properties. Lastly, monitor the oil level closely; rapid consumption can signal a problem, as mixed oils may burn off faster than expected.

Regular oil analysis can also help detect these issues early. Laboratory tests can reveal the presence of unwanted contaminants and breakdown products, providing insight into the oil’s condition. Addressing these signs promptly can help prevent serious engine damage.

undefined

Identifying the symptoms of mixed engine oils is crucial for preventing long-term engine damage. Misdiagnosing issues can lead to costly repairs and reduced engine performance. Understanding these symptoms will help in addressing problems before they escalate.

Common signs of mixing engine oils include changes in engine performance, such as unusual noises, increased engine temperature, or a drop in fuel efficiency. You may also notice a milky or frothy appearance in the oil, which indicates contamination. This can happen if water or coolant has mixed with the oil, leading to potential engine damage.

Another symptom is the presence of oil sludge, which can occur when different oil types are mixed, causing a breakdown of the oil’s properties. This sludge can clog the oil passages, leading to inadequate lubrication and increased wear on engine components. If you find that your oil level is consistently low or that the oil appears dirty or gritty, it’s a sign that the oil is not performing as it should.

Regularly checking your oil and monitoring for these symptoms can save you from costly repairs and extend the life of your engine. If you suspect mixing has occurred, consult with a professional mechanic to assess the situation and recommend the best course of action.

undefined

This section addresses the potential long-term consequences of mixing different types of engine oil. Understanding these implications is crucial for maintaining engine health and performance over time. Mixed oils can lead to a variety of mechanical issues that may not be immediately apparent.

One major concern is the formation of sludge. Mixing oils can alter the viscosity and chemical properties, causing additives to interact negatively. This may lead to the accumulation of sludge within the engine, which can restrict oil flow and reduce lubrication efficiency.

Another potential issue involves wear and tear on engine components. Different oils have varying levels of detergents, anti-wear agents, and friction modifiers. If these do not complement each other, it may result in increased friction and premature wear of critical engine parts.

Additionally, engine overheating may occur due to inadequate lubrication properties. Oils that are incompatible can break down faster under high temperatures, failing to protect the engine adequately.

Regularly checking the oil type and following manufacturer specifications can prevent these long-term issues. Always use the recommended oil grade and type to ensure optimal engine performance and longevity.

undefined

This section addresses the long-term effects of mixing different engine oils. Understanding these consequences is crucial for maintaining your vehicle’s performance and longevity. Over time, the impact of mixed oils can lead to various issues that might not be immediately apparent but can be detrimental in the long run.

Mixing engine oils can result in several problems, including:

  • Increased wear: Different oils have varying additives that can lead to increased engine wear when mixed, as they may not provide adequate protection.
  • Oil degradation: The chemical properties of each oil can interact negatively, causing premature degradation and reduced effectiveness.
  • Sludge formation: Incompatible oils can lead to sludge build-up, which clogs oil passages and hinders circulation.
  • Reduced oil pressure: Mixing oils can alter viscosity, which may result in decreased oil pressure and inefficient engine lubrication.

Regularly changing your oil and using the same type can prevent these issues. Always refer to your vehicle’s manual for the manufacturer’s recommendations regarding oil types and mixing allowances.

undefined

Understanding the consequences of mixing engine oils is crucial for any vehicle owner. This section outlines the final thoughts on identifying, preventing, and addressing the problems that arise from this common issue.

Mixing different types of engine oils can lead to several mechanical problems, such as reduced lubrication, increased engine wear, and potential overheating. Synthetic oils and conventional oils have different chemical compositions, which can cause them to react negatively when mixed. This reaction may lead to the formation of sludge, clogs, or even engine failure.

To mitigate these issues, always use the same type and brand of engine oil when changing or topping off. Regularly check your oil levels and quality, and consult your vehicle’s manual for manufacturer recommendations. If you suspect that you’ve mixed oils, consider performing an oil change as soon as possible to remove any potential contaminants. In severe cases, a professional assessment may be necessary to ensure the engine’s health.

By maintaining diligence in oil selection and regular maintenance, you can avoid the pitfalls associated with mixing engine oils and ensure your vehicle runs smoothly.

Quick Summary

  • Mixing different types of engine oil can lead to chemical reactions that compromise oil performance.
  • Compatibility issues may arise from mixing synthetic and conventional oils, resulting in reduced lubrication.
  • Contaminated oil mixtures can increase engine wear and lead to overheating.
  • Engine oil additives may not work effectively when mixed, reducing their protective qualities.
  • It is generally recommended to stick with the same brand and type of oil for optimal engine health.
  • Regular oil changes and maintenance can help avoid the problems associated with mixed oils.
  • Always consult the vehicle’s owner manual for specific oil recommendations and guidelines.

Frequently Asked Questions

What happens if I mix different types of engine oil?

Mixing different types of engine oil can lead to reduced performance and potential engine damage. Different oils have varying additives and properties, which may not work well together, affecting lubrication and engine protection.

Can I mix synthetic and conventional engine oil?

While it is technically possible to mix synthetic and conventional oils, it is not recommended. This can dilute the benefits of synthetic oil, such as better thermal stability and improved lubrication, which may compromise engine performance.

How can I tell if my oil is mixed or contaminated?

Signs of mixed or contaminated oil include unusual color changes, a milky appearance, or the presence of particles. Regularly checking your oil level and condition can help catch these issues early before they lead to more serious engine problems.

Will mixing oils void my warranty?

Mixing oils may void your warranty if it leads to engine damage or if the manufacturer specifies using a certain type of oil. Always consult your vehicle’s owner manual or a professional mechanic to ensure you are using the correct oil for your engine.

What should I do if I accidentally mixed engine oils?

If you accidentally mixed engine oils, it’s advisable to change the oil and filter as soon as possible. This will help prevent any potential engine issues and ensure that your engine is protected with the correct oil type.

Can You Mix Engine Oil Types? Pros, Cons, and Best Practices

Mixing different types of engine oil is a common concern among car owners. Many wonder if it’s safe or even beneficial. Understanding the implications of combining oil types can save you time, money, and potential engine issues, making this knowledge essential for every vehicle owner.

Mixing engine oil types is generally not recommended. Key points to consider include: different viscosities may not blend well, additives can react negatively, and manufacturer specifications should always be followed. It’s best to stick with the same type for optimal performance.

Engine Oil Types Explained

Understanding the different types of engine oil is crucial for maintaining your vehicle’s performance and longevity. Engine oils are formulated to provide lubrication, reduce friction, and protect engine components. The most common types include conventional, synthetic, and blended oils, each with unique characteristics that cater to specific engine requirements.

Conventional oil, derived from crude oil, is the most basic type and is often the least expensive. It is suitable for older vehicles and engines with low mileage but may require more frequent changes due to its lower stability at high temperatures.

Synthetic oil, on the other hand, is chemically engineered to provide superior performance and protection. It handles extreme temperatures and offers better fuel efficiency, making it ideal for newer engines and high-performance vehicles.

Blended oil combines elements of both conventional and synthetic oils, offering a balance of affordability and performance. This type is suitable for a wide range of vehicles and driving conditions.

Understanding these oil types helps in making informed decisions about mixing oils and ensuring optimal engine health.

Additive Components Overview

Additives play a crucial role in engine oils, enhancing their performance and longevity. Understanding these components is essential when considering mixing different oil types, as they can significantly affect engine compatibility and function.

Engine oil additives serve several key functions:

  • Detergents: Help clean engine parts by preventing sludge and deposits from forming.
  • Dispersants: Keep contaminants suspended in the oil to prevent them from settling and causing damage.
  • Anti-wear agents: Form a protective layer on engine components, reducing friction and wear during operation.
  • Viscosity index improvers: Help maintain oil thickness across a range of temperatures, ensuring proper lubrication.
  • Oxidation inhibitors: Slow down the degradation of oil due to heat and oxygen exposure, extending its usable life.
  • Foam inhibitors: Prevent the formation of foam in oil, which can reduce lubrication efficiency.

Different oil types come with varying additive packages tailored to specific engine requirements. Mixing oils with incompatible additives can lead to reduced performance or even engine damage. Always consult manufacturer recommendations before mixing different oil types.

Viscosity Ratings Importance

Viscosity ratings are critical indicators of an engine oil’s performance characteristics under varying temperatures and conditions. These ratings, often expressed in the format “XXW-YY,” represent the oil’s flow behavior, where “XX” signifies the low-temperature viscosity and “YY” indicates the high-temperature viscosity. Understanding these ratings helps in assessing whether different oil types can be mixed without compromising engine function.

The first number, followed by the “W” (which stands for winter), reflects the oil’s viscosity in cold conditions. A lower number means the oil flows more easily at lower temperatures, essential for cold starts. The second number represents the viscosity at higher temperatures, indicating how well the oil maintains its protective qualities as it heats up during operation. Higher numbers indicate thicker oils that provide better protection in hot conditions.

Mixing oils with different viscosity ratings can lead to inconsistent lubrication, potentially causing increased wear and tear on engine components. For example, combining a 5W-30 oil with a 10W-40 oil may affect the overall viscosity, resulting in suboptimal performance. Always consult manufacturer guidelines to ensure the oils used are compatible and suitable for specific engine requirements.

Mixing Compatibility Factors

Understanding the compatibility of engine oil types is crucial when considering mixing different oils. Several factors influence whether two oils can be safely combined without adverse effects on engine performance.

Base Oil Composition: Engine oils are primarily made from various base oils, which can be mineral, synthetic, or a blend. Mixing oils with different base oil types may lead to separation or degradation, negatively impacting lubrication.

Additive Packages: Engine oils contain additives that enhance performance, such as detergents, anti-wear agents, and viscosity modifiers. Different additive packages may not work well together, potentially leading to decreased protection and performance.

Viscosity Ratings: While viscosity was covered previously, it remains a compatibility factor. Mixing oils with significantly different viscosity ratings can result in poor lubrication, especially under extreme temperature conditions.

OEM Recommendations: Always refer to the manufacturer’s specifications for your vehicle. Some manufacturers explicitly state which oil types can be mixed without voiding warranties or causing damage.

By considering these factors, you can make informed decisions about mixing engine oil types while minimizing risks to your engine’s performance and longevity.

Mixing Methods and Precautions

Mixing different types of engine oil can be done effectively if the right methods and precautions are observed. Understanding how to properly combine oils ensures optimal engine performance and longevity. Follow these steps to mix engine oils safely and effectively.

Begin by selecting oils that are compatible based on their base types (mineral, synthetic, or semi-synthetic). Always check the labels for any specific warnings against mixing. If unsure, consult your vehicle’s manual or a professional mechanic.

Before mixing, make sure both oils are at room temperature to facilitate blending. Use a clean container to measure and combine the oils, ensuring that no contaminants are introduced. Pour the first oil into the container, followed by the second oil, and gently stir to mix them thoroughly.

After mixing, it is crucial to conduct a visual inspection. Look for any separation or unusual textures. If the oils do not blend well, do not use the mixture, as this could lead to engine damage. Always fill the engine with the mixed oil gradually and monitor for any unusual engine sounds or performance issues.

Regularly check oil levels and maintain communication with a mechanic for advice on oil changes and compatibility over time. Proper care in mixing will contribute to the engine’s overall health.

Real-World Mixing Scenarios

Mixing engine oils can occur in various practical situations. Understanding these scenarios helps clarify when and why users might combine different oil types. Here are some common examples:

1. Top-off Situations: When the oil level is low, but only a different type (like synthetic versus conventional) is available, many vehicle owners may add whatever oil they have on hand. This is especially common during emergencies.

2. Oil Change Combinations: If the last oil change was done with a specific brand or type of oil, and the next change is performed using a different oil, the two may mix. Some mechanics recommend this practice if the oils are compatible.

3. Seasonal Adjustments: In regions with extreme temperature variations, drivers may mix oils to achieve desired viscosity. For instance, mixing a 5W-30 with a 10W-30 to achieve better performance in cold conditions.

4. Engine Wear and Tear: Older engines may benefit from mixing oils to enhance lubrication properties. Adding a high-mileage oil to a conventional oil can help mitigate engine wear.

Awareness of these scenarios can guide decisions about mixing engine oil types, balancing convenience with potential risks.

Performance Impact Analysis

Understanding how mixing different engine oil types affects performance is crucial for maintaining engine health. The composition of engine oils varies, and combining them can lead to unexpected results. Here are the key impacts to consider:

  1. Viscosity Changes: Different oils have varying viscosities. Mixing can alter the overall viscosity, potentially leading to inadequate lubrication under specific temperature conditions.
  2. Additive Interference: Engine oils contain additives that serve specific functions. When mixed, these additives may react negatively, reducing their effectiveness and potentially leading to engine wear.
  3. Compatibility Issues: Oils may be formulated with different base stocks, and not all are compatible. Mixing can result in separation or degradation, causing sludge buildup.
  4. Cold Start Performance: The ability of oil to flow at low temperatures can be compromised. A poor cold start performance may lead to increased wear during engine startup.
  5. Long-Term Effects: Regularly mixing oils can have cumulative effects on engine performance, leading to reduced efficiency and longevity over time.

For optimal engine performance and longevity, it is advisable to stick to one type of engine oil as specified by the manufacturer.

Quick Summary

  • Mixing engine oil types can lead to reduced performance and potential engine damage.
  • Different oil types have varying additives that may not be compatible when mixed.
  • Always refer to the vehicle manufacturer’s specifications for recommended oil types.
  • Using synthetic oil with conventional oil may dilute the benefits of the synthetic oil.
  • It is generally advised to stick to one type and brand of engine oil for optimal engine health.
  • If mixing is unavoidable, ensure both oils are of the same viscosity grade.
  • Consult a professional mechanic if unsure about mixing engine oils.

Frequently Asked Questions

Can I mix synthetic and conventional engine oil?

Yes, you can mix synthetic and conventional engine oils, but it’s generally not recommended. Mixing them can reduce the effectiveness of the oil and may lead to decreased performance and protection.

What happens if I mix different viscosity grades of engine oil?

Mixing different viscosity grades can alter the overall viscosity of the oil, potentially affecting engine performance. It’s best to stick to the viscosity recommended by your vehicle’s manufacturer for optimal engine function.

Is it safe to mix different brands of engine oil?

While mixing different brands of engine oil is technically safe, it’s advisable to use oils from the same brand to maintain consistency in additives and performance. Different brands may have varying formulations that could impact engine protection.

What should I do if I accidentally mixed engine oils?

If you accidentally mixed engine oils, it’s not usually a cause for immediate concern, but you should consider an oil change as soon as possible. This will help restore the intended performance and protection for your engine.

Can mixing engine oil types void my warranty?

Mixing engine oil types might not void your warranty, but it could lead to issues that might not be covered. Always consult your vehicle’s warranty terms and follow the manufacturer’s recommendations to avoid potential problems.

Mixing Synthetic Oils: Is It Safe for Your Vehicle?

Many vehicle owners wonder if they can mix synthetic oils with traditional oils. This curiosity often stems from concerns about engine performance and maintenance. Understanding the compatibility of different oil types is crucial for keeping your engine running smoothly and efficiently.

Mixing synthetic oils is generally not recommended due to potential compatibility issues. However, if necessary, ensure both oils meet the same specifications and viscosity ratings. Always consult your owner’s manual for guidance on oil types suitable for your vehicle.

undefined

This section addresses the question: Can you mix synthetic oils? Understanding the compatibility of different oil types is crucial for maintaining engine health and performance. This guide will provide clarity on whether mixing synthetic oils is advisable and the potential implications of doing so.

Synthetic oils are designed to provide superior lubrication and protection compared to conventional oils. However, not all synthetic oils are created equal. They can vary in formulation and additives. Mixing different brands or types of synthetic oils could lead to reduced effectiveness, as the unique properties of each oil may not work well together. This could result in diminished performance and potential engine wear.

Manufacturers typically recommend using oils that meet the specifications outlined in the owner’s manual. If you do decide to mix oils, ensure they are both synthetic and have similar viscosity ratings. Generally, it’s best practice to avoid mixing oils unless absolutely necessary.

undefined

This section addresses the compatibility of synthetic oils with one another. Understanding whether you can mix different types of synthetic oils is crucial for maintaining optimal engine performance and ensuring longevity. Here, we will examine the factors influencing the mixing of synthetic oils and what to consider before doing so.

Mixing synthetic oils is generally possible, but it’s essential to understand the implications. Synthetic oils are formulated with different base stocks and additives, which can affect their performance and characteristics. If the oils are from the same brand and designed for similar applications, mixing is often safe. However, mixing oils of different brands or formulations can lead to unpredictable results, including reduced lubrication and increased wear.

Before mixing synthetic oils, check the specifications and performance ratings of each oil. Look for oils that meet the same industry standards, such as API or SAE ratings. If you decide to mix oils, it’s advisable to consult the manufacturer’s guidelines or a trusted mechanic. This ensures that any potential adverse effects on engine performance are minimized.

undefined

Understanding the compatibility of synthetic oils is essential for maintaining vehicle performance and longevity. Many vehicle owners wonder if they can mix different types of synthetic oils, particularly when topping off their engine oil or during oil changes. This section provides clarity on the matter.

Mixing synthetic oils is generally possible, but there are key factors to consider. Most synthetic oils are designed to be compatible with one another, especially if they are from reputable brands. However, mixing oils with different viscosities or additives can lead to reduced performance and potential engine issues. It’s advisable to check the specifications on the oil containers to ensure compatibility.

Using oil with the same viscosity grade is crucial. For example, mixing 5W-30 with 10W-30 may not cause immediate problems, but it can affect engine performance over time. Additionally, synthetic oils may contain different additives that can interact negatively, leading to sludge build-up or decreased lubrication efficiency.

If you find yourself in a situation where mixing is unavoidable, try to use oils from the same brand or at least those that meet similar specifications. Always consult your vehicle’s owner manual for recommendations regarding oil types and brands.

undefined

Understanding the compatibility of synthetic oils is crucial for maintaining your vehicle’s performance. This section addresses whether mixing different types of synthetic oils is advisable and what factors to consider when doing so.

Mixing synthetic oils can be done, but it is not always recommended. Different synthetic oils may have varying base stocks, additives, and formulations, which can affect their performance when combined. Here are some key points to keep in mind:

  • Base Oil Compatibility: Synthetic oils can be made from different base oils like Group III, IV, or V. Mixing oils from different groups may lead to reduced performance.
  • Additive Interaction: Each oil contains specific additives designed to enhance performance. Mixing oils may dilute these additives, leading to less effective lubrication and protection.
  • Manufacturer Recommendations: Always check your vehicle’s manual or consult with the manufacturer. Some manufacturers explicitly advise against mixing oils.
  • Oil Change Considerations: If you must mix oils, ensure that they are of the same viscosity grade and type (e.g., both fully synthetic or synthetic blend).

While mixing synthetic oils is possible, it is best to avoid it unless necessary. Stick to one brand and type to ensure optimal engine protection and performance.

undefined

Mixing synthetic oils can lead to various outcomes depending on the types of oils involved. Understanding the compatibility of different synthetic oils is crucial for maintaining engine performance and longevity. This section provides insights into what happens when synthetic oils are mixed and the considerations to keep in mind.

Most synthetic oils are designed with specific additives that enhance performance, protection, and efficiency. Mixing different brands or types may dilute these additives, which can affect the oil’s overall effectiveness. Additionally, different base oils can have varying properties, such as viscosity, which can lead to inadequate lubrication or increased wear.

Before mixing synthetic oils, consider the following factors:

  • Viscosity Ratings: Ensure both oils have the same viscosity rating (e.g., 5W-30). Mismatched viscosities can affect engine operation.
  • Base Oil Type: Synthetic oils can be formulated from various base stocks. Mixing different bases may lead to chemical reactions that compromise performance.
  • Additive Compatibility: Different manufacturers use unique additive packages. Mixing may neutralize some additives, reducing protection.

Consulting the vehicle’s manufacturer recommendations is advisable. If you must mix, use small amounts and monitor engine performance closely.

undefined

Mixing synthetic oils can be a common concern for vehicle owners. Understanding the compatibility of different synthetic oils is essential for maintaining engine performance and longevity. This section addresses the implications of mixing various synthetic oil types and the potential consequences.

Most synthetic oils are formulated to meet specific performance standards, which may vary between brands and oil types. While it is generally safe to mix synthetic oils, it is advisable to consider the base oil, additives, and viscosity. Different synthetic oils may contain varying additives that can react with one another, potentially reducing their effectiveness.

Using oils from the same brand is often recommended, as they are designed to work together. If you mix oils, ensure that they share similar viscosity ratings and specifications. For example, mixing 5W-30 and 10W-30 synthetic oils may not cause immediate harm, but it could lead to suboptimal engine protection.

In conclusion, while mixing synthetic oils is permissible, it is best to avoid it unless necessary. Regularly check your oil type and adhere to manufacturer recommendations to ensure optimal engine function and durability.

undefined

Understanding the compatibility of synthetic oils is crucial for ensuring optimal engine performance. Mixing different types of synthetic oils can have implications on lubrication quality and engine health. Here’s what you need to consider when contemplating the mixing of synthetic oils.

Not all synthetic oils are created equal. They can vary based on their base stocks, additives, and formulations. While some synthetic oils may mix without immediate adverse effects, others can lead to chemical reactions that diminish performance. For instance, mixing a synthetic oil designed for high-performance engines with a standard synthetic oil can result in a product that does not meet the required specifications for your vehicle.

Before mixing, check the specifications and compatibility of the oils. Refer to the manufacturer’s guidelines for both oils to ensure they share the same viscosity and performance ratings. It is advisable to avoid mixing oils from different brands unless they explicitly state compatibility. If unsure, it’s best to fully drain the existing oil and replace it with the desired synthetic oil to maintain engine integrity.

undefined

Mixing synthetic oils is a common concern among vehicle owners. Understanding the compatibility between different types of synthetic oils can significantly impact engine performance and longevity. This section provides practical insights into whether you can mix synthetic oils and what factors to consider.

Generally, mixing synthetic oils is not recommended due to potential differences in formulation, additives, and viscosity. When different oils are combined, they may not interact well, leading to reduced performance, increased wear, or even engine damage. However, if you find yourself in a situation where you must mix oils, follow these guidelines:

  • Check Viscosity Ratings: Ensure that both oils have the same viscosity rating (e.g., 5W-30) to maintain consistent engine protection.
  • Same Base Type: Try to mix synthetic oils from the same base (e.g., full synthetic with full synthetic) to minimize compatibility issues.
  • Consult Manufacturer Recommendations: Always refer to your vehicle’s owner manual or manufacturer guidelines regarding oil types and mixing.

In summary, while mixing synthetic oils is possible under certain conditions, it is best to avoid it unless necessary. Maintaining the same oil type and brand is ideal for ensuring optimal engine health.

Quick Summary

  • Mixing synthetic oils is generally acceptable, but it’s important to consider the compatibility of the oils.
  • Different synthetic oils may have varying additive packages, which can affect performance.
  • Always check the manufacturer’s recommendations when considering mixing oils.
  • Mixing oils of different viscosities can lead to suboptimal engine performance.
  • Using a single brand and type of synthetic oil is often recommended for consistency and reliability.
  • Regular oil changes are crucial, regardless of whether synthetic oils are mixed or not.
  • Consulting with a mechanic can provide guidance tailored to your specific vehicle and oil needs.

Frequently Asked Questions

Can you mix synthetic oils with conventional oils?

Yes, you can mix synthetic oils with conventional oils, but it’s not recommended. Mixing can reduce the effectiveness of the synthetic oil, potentially leading to decreased performance and protection.

What happens if I mix different brands of synthetic oil?

Mixing different brands of synthetic oil is generally safe, as most synthetic oils are compatible. However, it’s best to use oils from the same manufacturer to ensure optimal performance and maintain the intended properties of the oil.

Will mixing synthetic oils affect my vehicle’s warranty?

Mixing synthetic oils typically won’t void your vehicle’s warranty, but it’s important to follow the manufacturer’s specifications for oil type and service intervals. Always refer to your owner’s manual for guidance on acceptable oil combinations.

Is there a specific ratio for mixing oils?

There is no specific ratio for mixing synthetic and conventional oils; however, it’s advisable to keep the proportions as close to equal as possible. Strive to minimize the amount of conventional oil if you want to maintain the benefits of synthetic oil.

How often should I change my oil if I mix synthetic and conventional oils?

If you mix synthetic and conventional oils, it’s wise to follow the change interval for conventional oils, which is generally shorter. Regular oil changes will help ensure that your engine continues to receive optimal protection and performance.

How Long Does It Take To Replace Brake Pads Quick Brake Pad Change

Replacing brake pads is a task that many car owners face, and knowing how long it takes can help streamline your planning. It’s a straightforward process but requires a bit of attention to detail to ensure your vehicle remains safe and sound on the road.

Brake pad replacement typically takes between 30 minutes to 1 hour per axle, depending on your vehicle’s make and model. Factors such as expertise level and tool availability can influence this timeframe, but generally, it’s a quick repair that can fit into a busy schedule.

Introduction to Brake Pad Replacement

Introduction to Brake Pad Replacement

Replacing brake pads is a straightforward task that addresses both safety and vehicle performance. Typically, a professional mechanic can replace brake pads in about 30 minutes to an hour per axle. However, familiarity with the process and having the right tools can make this a quicker task for experienced individuals.

Why Brake Pads Need Replacing

Brake pads are essential for stopping your vehicle effectively. Over time, they wear down due to friction with the brake rotors. Worn brake pads can result in reduced braking efficiency, leading to longer stopping distances and increased risk of accidents. Regular replacement ensures optimal braking performance and safety.

Signs of Worn Brake Pads

  • Squealing or Squeaking Noises: High-pitched noises when braking suggest worn pads.
  • Grinding Sound: Indicates the brake pads are completely worn out and the metal is rubbing on the rotors.
  • Vibration when Braking: Warped pads can cause a pulsating feeling in the brake pedal.
  • Longer Stopping Distances: Noticeable decrease in braking efficiency.
  • Dashboard Indicator Light: Some vehicles have sensors that trigger a warning light.

By recognizing these signs early, you can time your brake pad replacement to avoid costly repairs and maintain vehicle safety.

Factors Affecting Replacement Time

The time taken to replace brake pads isn’t set in stone. It varies based on several factors. Let’s delve into these key elements that influence the duration of this task.

Vehicle Type

The type of vehicle plays a significant role in brake pad replacement time. A compact car with straightforward brake assemblies might take less time compared to an SUV or truck. Larger vehicles often have more complex braking systems, which can add to the replacement time.

Brake System Design

Different brake system designs can affect how quickly pads can be replaced. For instance:

  • Disc Brakes: Generally quicker to replace due to easier access.
  • Drum Brakes: These might take longer because they require more disassembly.

Mechanic Experience

The experience level of the mechanic also influences the time. A seasoned professional familiar with your vehicle model can complete the job more swiftly. In contrast, a novice might take additional time to ensure accuracy.

Tip: Choose a mechanic with experience in your specific vehicle type for faster service.

In summary, the time required to replace brake pads depends on the vehicle type, brake system design, and the mechanic’s expertise. Understanding these factors can help you plan your schedule more effectively.

Typical Time Estimates

Typical Time Estimates

Professional Replacement

When opting for professional brake pad replacement, the process is typically streamlined and efficient. On average, a skilled technician can replace brake pads in about 1 to 2 hours. This includes the time for inspection, removal of the old pads, installation of the new ones, and a quick test drive to ensure everything is functioning properly.

DIY Replacement

For those considering a do-it-yourself approach, the time required can vary based on experience and preparedness. A DIY enthusiast with some mechanical knowledge might take about 3 to 4 hours to complete the task. This accounts for setting up, gathering tools, and following step-by-step guides or videos.

Tip: Ensure you have all necessary tools and parts ready before starting to avoid unnecessary delays.

Tools and Equipment Required

Essential Tools

To efficiently replace brake pads, having the right tools is non-negotiable. Here’s a concise list of what you’ll need:

  • Jack and Jack Stands – Essential for safely lifting and supporting the vehicle.
  • Lug Wrench – Required to remove the wheel nuts.
  • C-clamp or Brake Piston Tool – Used to compress the brake caliper piston.
  • Socket Set and Ratchet – Necessary for removing the caliper bolts.
  • Flathead Screwdriver – Helpful for removing the caliper clip or spring.
  • Torque Wrench – Ensures that bolts are tightened to the manufacturer’s specifications.
  • Brake Pad Spreader – Another tool option to press the piston back into the caliper.

Optional Tools

While not strictly necessary, these tools can make the process smoother:

  • Brake Cleaner – Useful for cleaning brake components.
  • Anti-seize Compound – Prevents bolts from sticking and eases future maintenance.
  • Rubber Mallet – Can assist in loosening stuck components.
  • Wire Brush – For cleaning rust from caliper brackets.

Tip: Always consult your vehicle’s manual for specific instructions and torque specifications for your model.

Step-by-Step Replacement Process

Step-by-Step Replacement Process

Preparation

Before starting, ensure all necessary tools and materials are ready. You’ll need a jack, jack stands, lug wrench, C-clamp, and new brake pads. Make sure the vehicle is parked on a level surface, and set the parking brake.

Removal of Old Pads

  • Loosen Lug Nuts: Slightly loosen the lug nuts on the wheel with the brake pads to be replaced.
  • Lift the Vehicle: Use the jack to lift the vehicle and secure it with jack stands for safety.
  • Remove Wheel: Fully remove the lug nuts and take off the wheel.
  • Remove Caliper: Locate the brake caliper and remove the bolts holding it in place. Carefully slide it off the rotor, ensuring not to damage the brake line.
  • Old Pads Removal: Take out the old brake pads from the caliper bracket.

Installation of New Pads

  • Compress Caliper Piston: Use a C-clamp to gently push the caliper piston back into its housing to accommodate the new, thicker pads.
  • Install New Pads: Place the new brake pads into the caliper bracket.
  • Reattach Caliper: Reposition the caliper over the rotor and secure it with the bolts.
  • Reinstall Wheel: Put the wheel back on, tighten the lug nuts by hand.
  • Lower Vehicle: Remove the jack stands and carefully lower the vehicle.
  • Tighten Lug Nuts: Fully tighten the lug nuts once the vehicle is on the ground.

Testing

Start the vehicle and pump the brake pedal to ensure proper pressure build-up before driving. Conduct a test drive at low speed to confirm the brakes are functioning correctly.

Best Practices for Efficient Replacement

Planning Ahead

Time efficiency starts with preparation. Before touching a wrench, ensure you have the correct brake pads for your vehicle model. Check the manufacturer’s specifications and confirm compatibility. Ordering parts online? Allow extra time for shipping.

Organizing Tools

  • Socket Set: A full set ensures you have the right size for lug nuts and caliper bolts.
  • Jack and Jack Stands: A hydraulic jack speeds up lifting, while stands ensure safety.
  • C-Clamp or Brake Piston Tool: Necessary for compressing the brake caliper piston.
  • Torque Wrench: Essential for safely securing lug nuts to the correct specification.

Lay out all tools within reach to minimize downtime during the process.

Safety Precautions

Safety should never be compromised. Wear safety glasses and gloves to protect against debris and sharp edges. Ensure the vehicle is on a flat surface before lifting. Double-check jack stands for stability. Never work under a vehicle supported only by a jack.

Tip: Consider timing your replacement for when you have no critical appointments. This allows for unforeseen challenges without stress.

Professional vs DIY: Time Comparison

Replacing brake pads can be tackled either by a professional mechanic or as a DIY project. Let’s compare the time investment for each method.

Pros and Cons of Each Method

Professional Replacement

  • Time Required: Approximately 1 to 2 hours.
  • Pros: Guaranteed expertise, less personal effort, potential warranty on service.
  • Cons: Higher cost due to labor fees, may require scheduling and waiting for availability.

DIY Replacement

  • Time Required: Approximately 2 to 4 hours, depending on experience and tools available.
  • Pros: Cost-effective, personal satisfaction from doing the work, flexible timing.
  • Cons: Requires tools and knowledge, higher risk of errors, no service warranty.

For those prioritizing speed, a professional service is generally faster and more reliable. DIY enthusiasts, however, may save money but should be prepared for a longer process and potential learning curve.

Scheduling Your Brake Pad Replacement

When to Schedule

Replacing brake pads is a task that should be scheduled with precision to minimize disruption to your schedule. On average, a brake pad replacement takes about 1 to 2 hours. This timeframe can vary based on the vehicle model and the mechanic’s proficiency. To ensure you’re not left waiting, it’s wise to book a time slot that allows for potential delays.

Finding the Right Service

Choosing a reliable service provider can further streamline the process. Consider these factors:

  • Reputation: Look for mechanics or service centers with positive reviews and a track record of timely service.
  • Convenience: Select a location that is easily accessible from your home or workplace.
  • Appointment Flexibility: Providers offering online booking or extended hours can help fit the service into your busy schedule.

Tip: Schedule your appointment during off-peak hours, like mid-morning or early afternoon, to avoid longer wait times.

Quick Summary

  • Replacing brake pads typically takes about 1 to 3 hours, depending on the vehicle make and model.
  • Experienced mechanics may complete the task faster, while DIY efforts might take longer.
  • Preparation and having the right tools, such as a jack, lug wrench, and brake pad spreader, can speed up the process.
  • Regular brake inspections can identify wear early, ensuring timely replacement and avoiding complications.
  • Scheduling the replacement during less busy hours at a service center can minimize waiting time.
  • Consider the quality of brake pads, as higher quality pads may last longer, affecting future replacement intervals.

Frequently Asked Questions

How long does it take to replace brake pads?

Replacing brake pads typically takes about 1 to 2 hours for a professional mechanic. This time may vary slightly depending on the vehicle model and the mechanic’s experience.

Can I replace brake pads myself?

Yes, you can replace brake pads yourself if you have basic mechanical skills and the right tools. However, it is important to follow instructions carefully to ensure safety and efficiency.

What factors can affect the time it takes to replace brake pads?

Factors that can affect replacement time include the vehicle’s make and model, the condition of other brake components, and the mechanic’s experience. Additional repairs needed can also extend the time.

Do I need to replace brake pads on all wheels at once?

It is recommended to replace brake pads on both wheels of the same axle at the same time to ensure balanced braking. However, front and rear brake pads can be replaced at different times if necessary.

How often should brake pads be replaced?

Brake pads typically need replacement every 30,000 to 70,000 miles, but this varies based on driving habits and conditions. Regular inspections can help determine the right time for replacement.